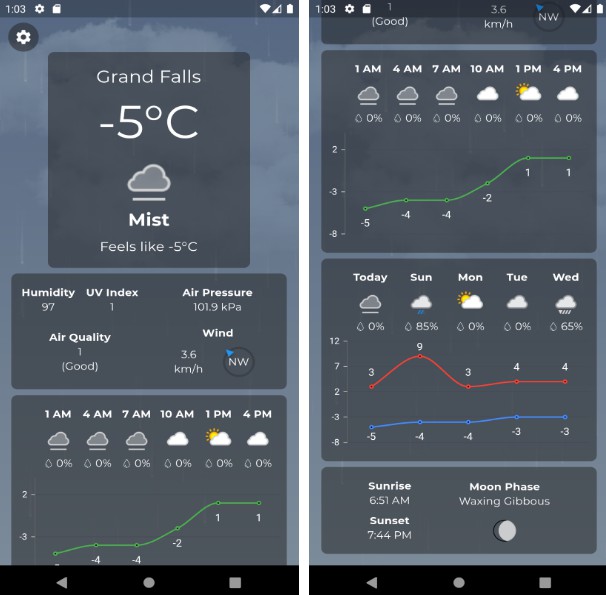
Building a Flutter Weather App: Your Ultimate Guide to Weather APIs
There is something undeniably satisfying about building your own weather app. It’s the classic "Hello World" of mobile development, but with a twist. You’re not just rendering static text; you’re fetching live data from the internet, parsing complex JSON structures, and handling asynchronous operations in real-time. For Flutter developers, this project bridges the gap between UI design and backend logic perfectly.
However, the devil is in the details. Choosing the right weather API, managing API keys securely, and handling error states can make or break the user experience. If you’ve ever stared at a blank screen wondering why your app isn’t updating the temperature, you are not alone. The challenge rarely lies in the Dart code itself, but rather in how you interact with external services.
Why the API Choice Matters More Than You Think
Before writing a single line of code, you need to decide where your data is coming from. The market is flooded with weather providers, but not all are created equal. Most beginner tutorials point you toward OpenWeatherMap, and for good reason. It offers a generous free tier, straightforward documentation, and supports both current weather and forecasts.
That said, if you are building a professional-grade application, you might want to look at alternatives. Services like WeatherAPI.com or the Tomorrow.io platform often provide more granular data points, such as severe weather alerts or hyperlocal precipitation forecasts. The key is to read the rate limits carefully. If your app queries the server every time the user tilts their phone, you will burn through your quota faster than you can say "thunderstorm."
Structuring Your Data Models in Dart
Once you have your API key, the next hurdle is mapping that messy JSON response to clean Dart objects. This is where many developers stumble. They write manual constructors for every single field, leading to bloated, hard-to-maintain code. Instead, consider using tools like `json_serializable` or leveraging the `freezed` package.
Let’s look at a typical response. A weather API might return a main object containing temperature, humidity, and pressure, nested alongside a weather array that describes conditions like "Clouds" or "Rain." Your Dart model needs to reflect this hierarchy.
- Temperature: Always handle units correctly. APIs usually return Kelvin by default, so you’ll need a method to convert to Celsius or Fahrenheit based on user preference.
- Condition Codes: Numerical codes (like 200 for thunderstorm) need to be mapped to readable strings or icons. Hardcoding these mappings in your UI layer is a mistake; keep the logic in a helper class.
- Timestamps: API times are often in Unix timestamps. Use Dart’s
DateTimeutility to convert these into human-readable dates relative to the device’s locale.
A well-structured data layer keeps your UI layer dumb. The UI should only care about displaying values, not calculating them from raw network payloads.
Making HTTP Requests Without the Headache
Fetching data in Flutter is straightforward thanks to the http package, but there is a better way to manage it at scale. Directly calling http.get()> inside your UI widgets couples your view to the network logic, making testing a nightmare. Instead, use a repository pattern. Create a service class that handles all HTTP calls and returns either the data or an error object.
Dio is another popular choice for this task. It offers interceptors, which allow you to inject your API key into every request automatically without repeating code. Think of it as middleware for your network layer. It handles serialization and error broadcasting efficiently.
One common pitfall is forgetting to handle network errors gracefully. What happens when the user loses Wi-Fi? Your app shouldn’t crash. It should show a "No Connection" state and offer a retry button. Use a try-catch block in your repository to catch HTTP exceptions and map them to user-friendly messages.
Handling Security: Hide Those Keys!
I cannot stress this enough: never, ever hardcode your API key in your main.dart file or commit it to GitHub. As soon as your code is public, someone will scrape your key and use up your free tier for their own projects.
The standard approach is to use a .env file. Add it to your .gitignore so it stays private. Then, use the flutter_dotenv package to load variables at runtime. For production builds, consider using Firebase Cloud Functions or a backend proxy to hide the key entirely. This adds complexity but ensures your secret stays secure even if someone reverse-engineers your APK.
Designing for State Changes
A weather app is beautiful until it freezes. State management is crucial here. When the app launches, you need a loading indicator. Once data arrives, you swap it for the weather card. If the request fails, show an error screen. Packages like Provider, Riverpod, or Bloc make this transition smooth.
Consider adding pull-to-refresh functionality. Users expect to manually update the forecast. Also, think about caching. Fetching the same hourly forecast every minute is wasteful. Use a local database like SQLite or Hive to cache results for a few hours. This makes the app feel instant, even when the network is slow.
Common Pitfalls to Avoid
One subtle issue developers face is timezone handling. APIs usually return data in UTC or the local timezone of the city queried. Ensure your app converts times correctly based on the user’s location, not just the server location.
Another trap is ignoring the icons. Weather icons are tiny but carry massive visual weight. Ensure your SVG or PNG assets are scalable and match your app’s theme. Dark mode compatibility is also a must. A white sun icon on a dark background is easy to read, but a gray cloud might disappear entirely without proper contrast adjustments.
FAQs
Which weather API is best for a Flutter beginner?
OpenWeatherMap is widely considered the best starting point. The documentation is extensive, the free tier is sufficient for learning, and there are countless community examples available online to guide you.
Do I need a backend for my weather app?
Technically, no. You can fetch data directly from the provider. However, for production apps, a backend is recommended to handle API keys securely and manage rate limiting on the server side.
How do I handle location permissions?
You must use the geolocator package to request permission. Always check if permissions are granted before trying to access location coordinates. If the user denies access, provide a fallback to manual city search.
Building a weather app is more than just fetching numbers; it is about creating a reliable, fast, and visually pleasing experience. By respecting the API contract, securing your keys, and managing state intelligently, you’ll build an app that users actually want to open every morning.