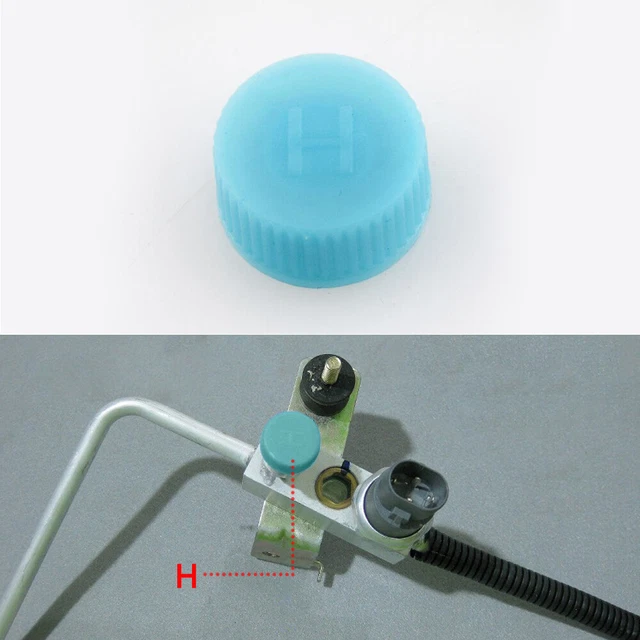
How to Choose the Right Low‑Pressure Port Cap for Your AC
When you glance at the back of an air‑conditioning unit, the tiny screw‑type cap on the low‑pressure side can easily be overlooked. Yet that little piece plays a big role in keeping the refrigerant sealed and the system running smoothly. Below we’ll walk through the basics, the signs that something’s off, and the steps to pick a replacement that fits your setup without a fuss.
What Exactly Is a Low‑Pressure Port Cap?
The low‑pressure port, sometimes called the suction line service port, is where technicians hook up gauges to check system pressure. The cap that covers it protects against moisture, dirt, and accidental leaks. Think of it as a tiny guard‑dog for the refrigerant pathway.
Why It Matters
Even a small leak at this point can cause:
- Reduced cooling efficiency
- Higher energy bills
- Potential damage to compressors
Because the low‑pressure side works under a vacuum, any breach lets air and moisture sneak in, which can turn into acid inside the system over time.
Common Types of Caps
Manufacturers don’t all agree on a single design, so you’ll encounter a few variations:
Standard Threaded Caps
These are the most common. They screw onto a 1/4‑inch flare fitting and usually have a rubber O‑ring for sealing.
Quick‑Connect Caps
Often found on newer, “service‑ready” units. They snap onto a push‑in fitting, making removal faster for technicians.
Metal vs. Plastic
Metal caps—typically brass or aluminum—are durable and resist corrosion. Plastic caps are lighter and cheaper, but may crack in extreme temperatures.
How to Spot a Bad Cap
Here are the tell‑tale signs that the cap needs attention:
- Visible rust or corrosion on the threads
- A cracked or missing O‑ring
- Moisture or oil residues around the fitting
- Unusual hissing sounds when the system runs
If any of these show up, replace the cap before the next service visit. Ignoring it could mean a costly repair down the line.
Choosing the Right Replacement
It’s not just a case of “any cap will do.” Follow these quick checks:
Match the Thread Size
Most residential ACs use a 1/4‑inch flare thread, but double‑check your unit’s manual. Using the wrong thread can strip the fitting.
Material Compatibility
If your system’s metal is copper, a brass cap is a safe bet. For aluminum condensers, an aluminum‑grade cap avoids galvanic corrosion.
Seal Quality
Look for caps that come with a pre‑filled silicone or nitrile O‑ring. Those materials stay flexible longer than cheap rubber.
Temperature Rating
Pick a cap rated for at least 150 °F (65 °C). Some outdoor units see higher temps on sweltering days.
Step‑by‑Step: Replacing the Cap
Even if you’re not a certified technician, swapping a cap is a manageable DIY task.
- Turn off the power. Shut down the thermostat and disconnect the breaker to avoid any surprise energization.
- Release pressure safely. Connect a gauge set if you have one, then open the high‑pressure side briefly to let the system equalize.
- Remove the old cap. Use a wrench—often a 7‑mm nut driver works—to unscrew it clockwise. Be gentle; you don’t want to strip the threads.
- Inspect the threads. Clean away any debris with a soft brush and wipe with a lint‑free cloth.
- Install the new cap. Apply a thin layer of thread sealant if the manufacturer recommends it, then screw the cap on counter‑clockwise until it’s snug. Don’t overtighten.
- Check the seal. After re‑powering, look for any signs of leakage around the cap. A steady, quiet system is a good sign.
When in doubt, call a licensed HVAC professional. A short call can save you from a bigger headache later.
Maintenance Tips to Extend Cap Life
These habits keep the cap—and the whole AC—happy:
- Inspect the cap during each seasonal service.
- Apply a light spray of silicone lubricant to the O‑ring once a year.
- Keep the surrounding area free of dust and chemicals that might degrade the seal.
- Replace the cap if you notice any signs of wear, even if the system seems fine.
When to Consider Professional Help
If you encounter any of the following, it’s smarter to hand the job over to an expert:
- Thread damage that can’t be cleaned up
- Repeated leaks despite cap replacement
- Unusual pressure readings after the cap is installed
- Lack of the appropriate tools, such as a gauge set for pressure relief
Technicians have specialized equipment—like leak detectors and vacuum pumps—to diagnose deeper issues that a simple cap swap can’t resolve.
Bottom Line
The low‑pressure port cap might be small, but it safeguards the heart of your air‑conditioning system. By matching the right size, material, and seal, you keep moisture out and performance in. A quick visual check, a sensible replacement, and occasional maintenance can make the difference between a smooth‑running summer and an unexpected service call.