How to Create Virtual COM Ports in Windows 10 – A Simple Step‑By‑Step Guide
Ever needed a serial connection but your modern laptop has no physical RS‑232 port? A virtual COM port (VCP) can fill that gap, tricking software into thinking a real serial cable is attached while the data travels over USB or even a network. Windows 10 makes it surprisingly straightforward, provided you know which tools to use and the quirks to watch out for.
Why Use a Virtual COM Port?
Virtual COM ports are handy in a few common scenarios:
- Legacy applications that only speak COM x and refuse to accept modern USB interfaces.
- Testing firmware updates without risking a physical device.
- Routing serial data between two programs on the same PC, such as a logger and a simulator.
In each case the operating system pretends there’s a serial line, while the underlying driver handles the actual traffic.
Choosing the Right Tool
Windows doesn’t ship with a built‑in VCP manager, so you’ll need third‑party software. The most popular (and free) options are:
- com0com – an open‑source null‑modem emulator that creates paired ports (e.g., COM5 ↔ COM6).
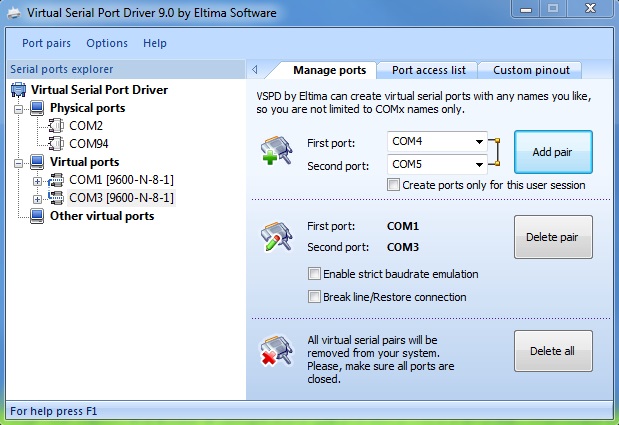
- Virtual Serial Port Driver (VSPD) – a commercial product from Eltima with a polished GUI and support for network‑based ports.
- HW VSP – a lightweight utility that adds a single virtual port and can link it to a USB‑to‑serial adapter.
If you only need a quick pair for testing, com0com is usually enough. For more complex setups—say, exposing a virtual port over Ethernet—VSPD might be worth the investment.
Installing com0com on Windows 10
Step 1: Download the Installer
Head to the com0com project page and grab the latest Windows 10 compatible zip file. Inside you’ll find setup.exe and a handful of driver files.
Step 2: Run the Installer with Administrator Rights
Right‑click setup.exe → Run as administrator. The installer will prompt you to allow unsigned driver installation; click “Yes” if you trust the source.
Step 3: Accept the Default Pair
By default com0com creates COM5 and COM6 as a linked pair. You can keep these names or change them later via the configuration utility.
Step 4: Verify the Ports
Open Device Manager (Win + X → Device Manager) and expand “Ports (COM & LPT)”. You should see both COM5 and COM6 listed as “Virtual serial port”. If they appear, the driver is active.
Customising Your Virtual Ports
Sometimes you need a specific COM number because the legacy software expects, say, COM3. The com0com GUI (setupc.exe) lets you rename ports easily.
- Select the pair you want to modify.
- Click “Change Port Name”.
- Enter the desired number (e.g., COM3) and click OK.
- Windows may prompt you to reboot; a quick restart clears any lingering references.
Remember, two virtual ports are always created as a duo—a “null‑modem” link. Data written to one appears on the other, mimicking a cross‑over cable.
Using the Virtual Ports in Practice
Suppose you have a piece of software that reads sensor data from COM3. After renaming the com0com pair to COM3 ↔ COM4, you would:
- Configure the software to use COM3.
- Run a separate script or terminal program that opens COM4 and feeds it data.
- Watch the primary application react as if a physical device were attached.
This arrangement is perfect for development environments where the actual hardware isn’t yet available.
Advanced Scenario: Sharing a Virtual COM Port Over Network
If you need to expose a virtual serial port from one PC to another, VSPD (or its free trial) offers a “TCP/IP Server” mode. The workflow looks like this:
- Install VSPD on the host machine and create a virtual port, say COM7.
- Enable “Network Server” for COM7, specifying a port number (e.g., 5000).
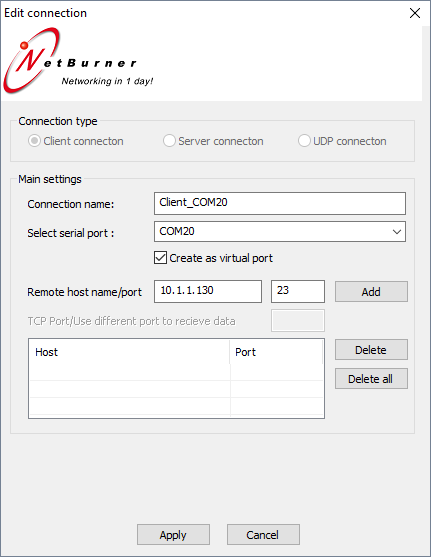
- On the client PC, install VSPD, add a “Network Client” that points to the host’s IP and port 5000, and map it to COM8.
- Now any data sent to COM7 on the host arrives at COM8 on the client, seamlessly.
While this adds a layer of latency, it’s a solid solution for remote debugging or integrating with IoT devices.
Common Pitfalls and How to Avoid Them
- Driver signing warnings – Windows 10’s driver enforcement can block unsigned drivers. Use the “Test Signing” mode (run
bcdedit /set testsigning onin an elevated command prompt) or stick with signed builds. - Port conflicts – If a physical device already occupies COM5, com0com’s default choice will clash. Always check Device Manager first and choose unused numbers.
- Permissions – Some applications need administrator rights to access virtual ports. Launch the app “as administrator” if you encounter “Access denied” errors.
- Reboot required – After changing port numbers, a quick restart clears stale references and prevents “Device not ready” messages.
Testing Your Setup
A quick sanity check can be done with the built‑in mode command:
mode COM5It should return the current settings (baud rate, parity, etc.). Then, open two instances of PuTTY or any terminal program:
- Connect one to COM5, the other to COM6.
- Type something in the COM5 window; it should instantly appear in the COM6 window, confirming the virtual link works.
When to Move Beyond Virtual Ports
Virtual COM ports are a brilliant stopgap, but they’re not a replacement for genuine hardware when timing is critical. If you notice jittery performance, especially over a network link, consider using a real USB‑to‑serial adapter or a dedicated hardware bridge.
Wrapping Up
Setting up a virtual COM port on Windows 10 doesn’t have to feel like a rite of passage. With a free tool like com0com, a handful of clicks, and a bit of verification, you can give legacy software a modern lifeline. Whether you’re debugging firmware, feeding synthetic data, or sharing a serial stream across the LAN, the steps above should get you up and running without a fuss.

![Create Virtual COM Ports for IoT Development [Windows OS]](https://www.virtualserialportdriver.com/images/upload/VSPD/pair.jpg)