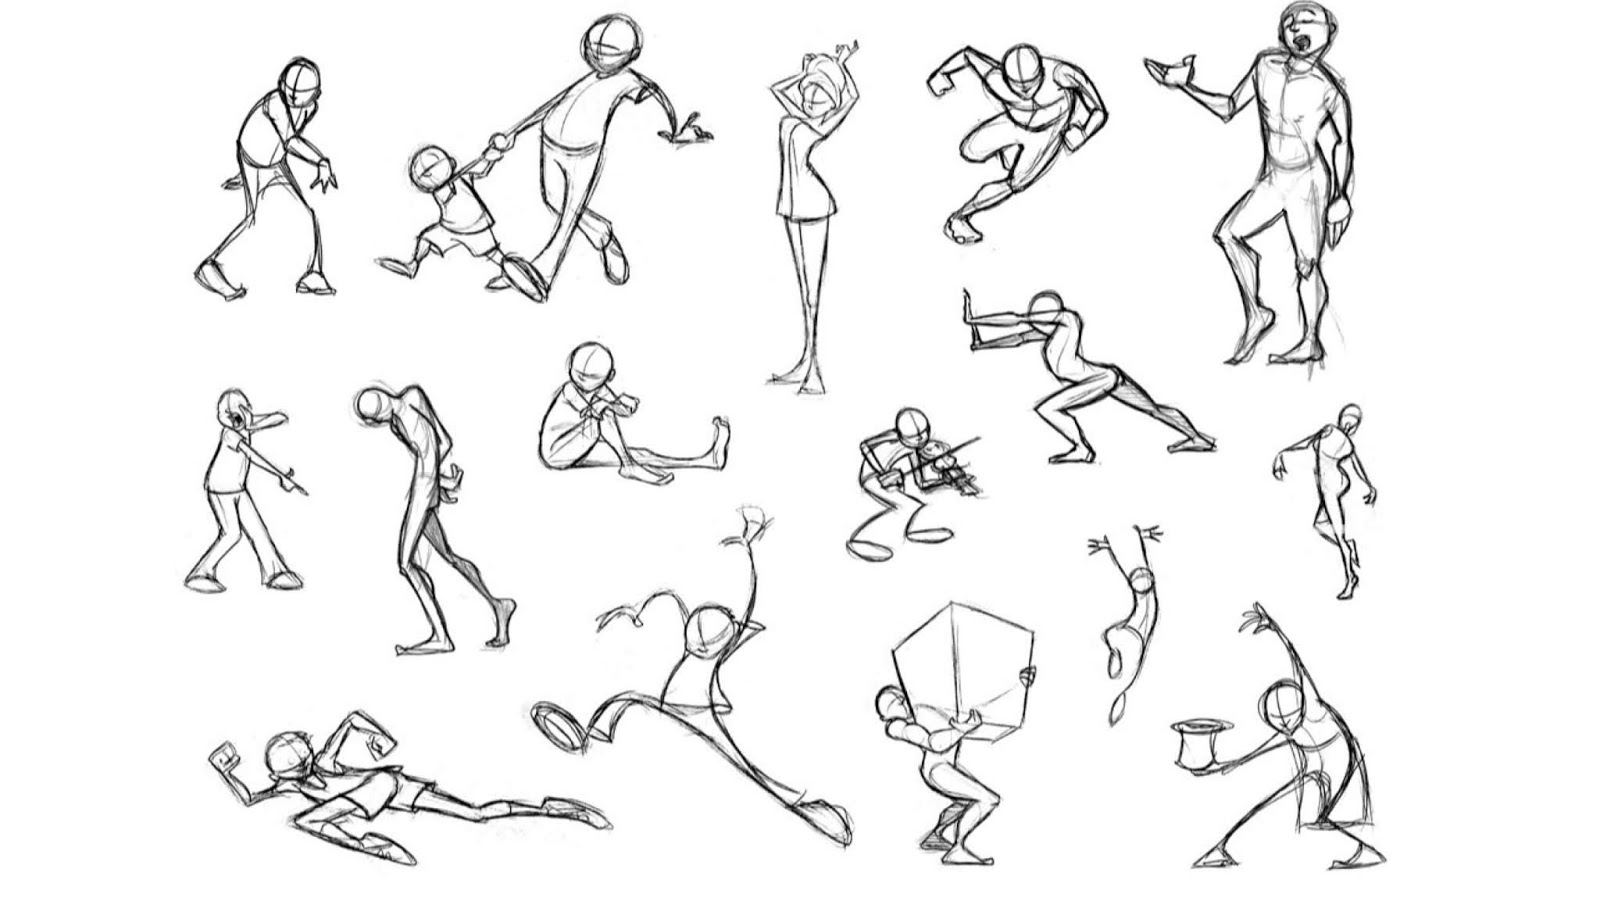
How to Draw the Human Figure: A Comprehensive Guide
Ever stared at a blank page and felt the human form slipping through your fingertips? You’re not alone. Sketching the body is as much about observation as it is about practice, and this guide walks you through the key steps without drowning you in jargon.
Understanding Proportions
Before any line appears, get comfortable with the classic “head‑count” system. Most adult figures stand roughly seven to eight heads tall. That simple ratio becomes a reliable scaffold for everything from a towering athlete to a child’s petite silhouette.
- Head as a unit: Measure the torso, limbs, and even the distance between the eyes using the head’s height.
- Variations matter: A fashion model may stretch to nine heads; a toddler may compress to five.
Don’t let the numbers feel rigid. Your eye will often correct small deviations, especially when you’re capturing motion.
Building the Skeleton
Think of the skeleton as a stick‑figure blueprint. Start with a simple line for the spine, then add circles for the major joints – shoulders, elbows, wrists, hips, knees, and ankles. This stage isn’t about detail; it’s about placement and balance.
A quick tip: tilt the spine slightly forward for a relaxed pose, or backward for a dynamic, action‑packed stance. Even a subtle curve can suggest weight distribution.
Key Joint Tips
- Shoulders: Imagine a shallow “T” shape. The angle should reflect whether the arms are at rest or energized.
- Hips: A wider “V” indicates a posture ready to move; a narrower shape feels more static.
- Knees: Slightly bent knees often convey a figure in motion, even if the rest of the body appears still.
Adding Mass and Volume
Once the stick figure feels solid, start fleshing out the muscles and fat layers. Notice how the ribcage flares subtly under the arms, or how the thigh bulges near the knee. Light shading can suggest curvature before you commit to full‑toned outlines.
Don’t obsess over anatomically perfect muscle groups on the first pass. A simple, rounded shape often reads better than an overly detailed, stiff form. Refine later as you gain confidence.
Common Pitfalls
- Over‑emphasizing the torso’s width – it can make the figure look blocky.
- Neglecting the subtle inward curve of the waist – this gives the illusion of a natural silhouette.
- Forgetting the slight forward lean of the shoulders when the arms are raised.
Rendering Light and Shadow
Light is the storyteller of any figure drawing. Decide on a single light source – a window, a streetlamp, or even a soft overcast sky – and let it guide your shading.
Begin with broad, light‑to‑dark transitions:
- Core shadow: Area directly opposite the light, usually under the chin, inside the elbow, and beneath the hips.
- Cast shadow: The silhouette the body throws onto the ground or surrounding objects.
- Reflected light: A faint glow that can lift shadows on the opposite side, especially on rounded surfaces.
Use a soft pencil or a blending stump for subtle gradients; a hard lead for crisp edge work. The occasional, deliberate hard line can add drama, but keep it purposeful.
Practical Tips and Exercises
Skill improves when practice is structured. Try these quick drills during short breaks:
- Gesture sketches: 30‑second poses from a live model or a photo. Capture the flow, not the detail.
- Contour drawing: Without looking at your paper, trace the outline of a body. It trains hand‑eye coordination.
- Proportion drills: Draw heads stacked to match the height of a full figure. Count as you go.
Mix media – charcoal for bold gestures, ink for crisp outlines, watercolor for soft washes. Each medium reveals different aspects of the human form and keeps the process fresh.
Choosing the Right Reference
Photography makes a handy reference, but it can flatten the three‑dimensional feel. Whenever possible, work from live models or 3‑D mannequin software. If you rely on photos, pick ones with clear lighting and multiple angles.
Remember that no reference is perfect. Slightly exaggerate or simplify elements that don’t serve your composition. Your drawing is a synthesis, not a carbon copy.
Putting It All Together
Start with the proportioned skeleton, flesh out the volumes, apply light and shadow, and finally, add the details that make the figure unique – a clenched fist, a turned head, the subtle tension in the neck.
Take a step back frequently. A short pause often reveals a misaligned elbow or a shadow that feels too harsh. Small adjustments at this stage prevent larger rework later.
And when the drawing feels “right,” even if it’s not perfect, celebrate that moment. The human figure is notoriously fickle; each sketch is a conversation between you and the canvas.