How to Format APA 7th Edition in Word Like a Pro Easily
Whether you’re tackling a research paper for a class or polishing a manuscript for publication, getting the APA 7th edition style right in Microsoft Word can feel like a maze. The good news? Most of the tricky bits can be handled with a few built‑in Word tools and a bit of know‑how. Below you’ll find a step‑by‑step walk‑through that lets you focus on your content while Word takes care of the formatting.
Set Up the Basics Before You Write
Starting with a clean slate saves time later. Open a new blank document and adjust these core settings:
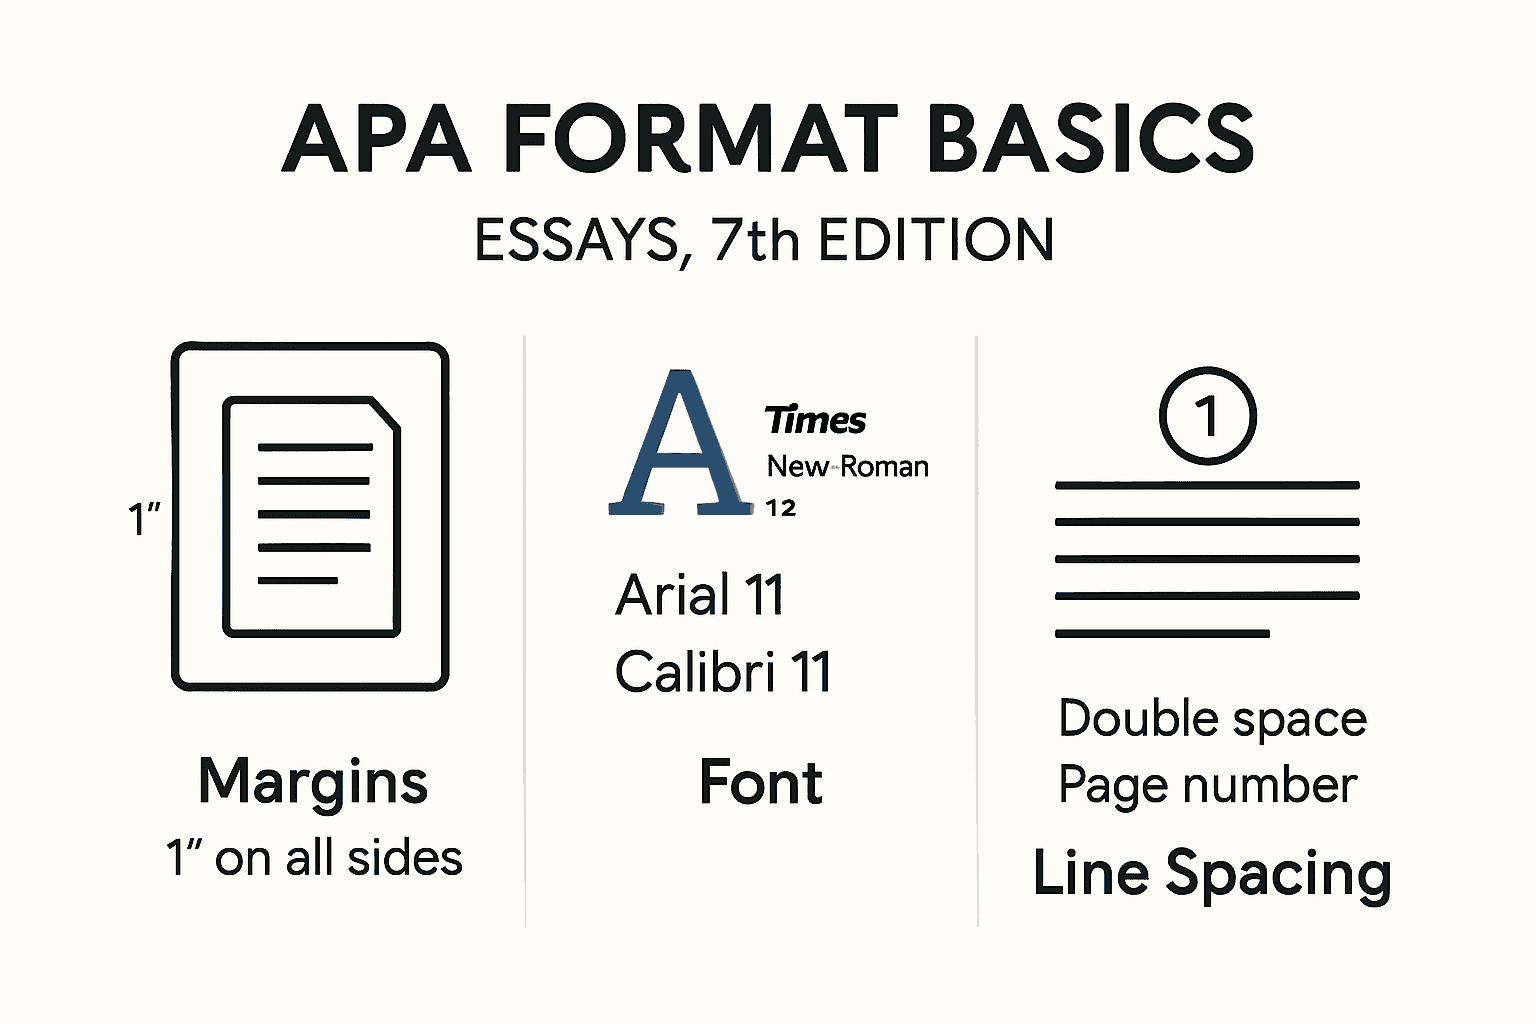
- Font & Size: Choose Times New Roman 12‑pt (or a sanctioned alternative like Arial 11‑pt). Consistency matters more than personal preference.
- Line Spacing: Select Double spacing for the entire document. In the Paragraph dialog, make sure “Don’t add space after paragraph” is unchecked.
- Margins: Go to Layout → Margins → Custom Margins and set 1‑inch on all sides.
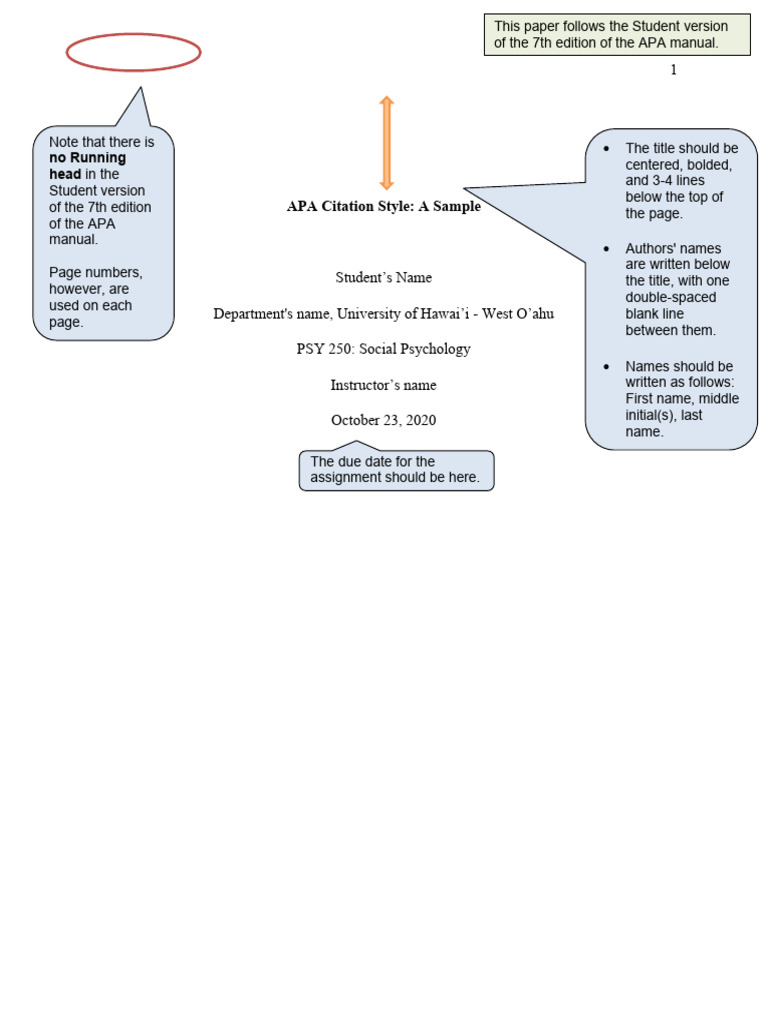
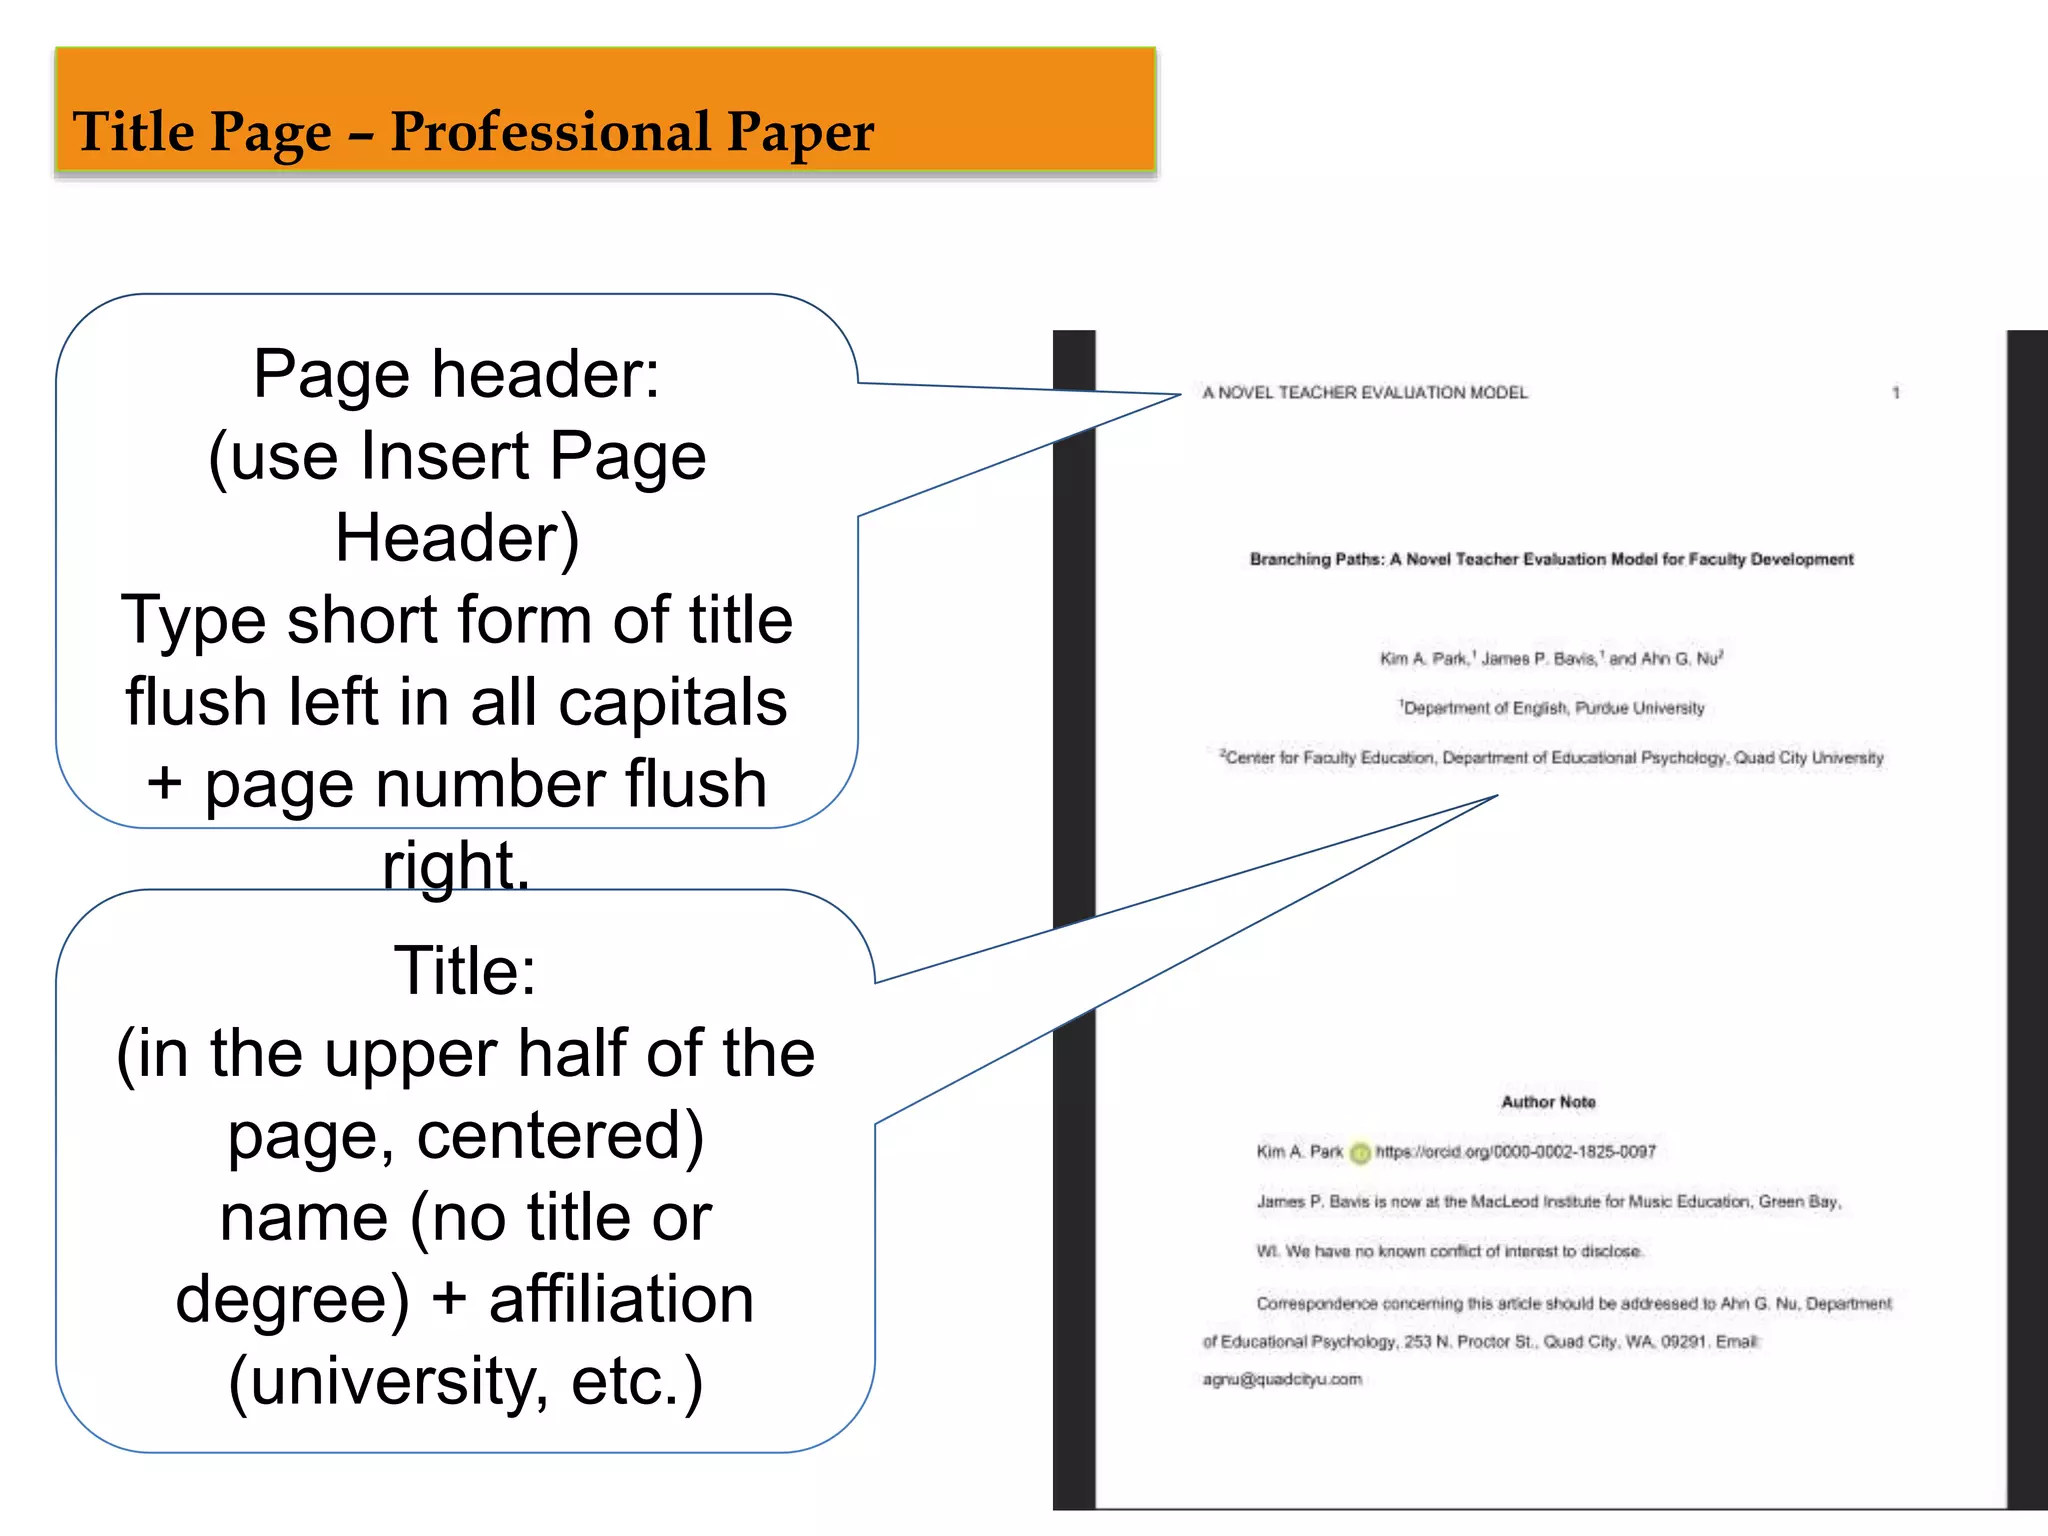
- Header: Insert a running head (for student papers, just the page number is enough). Use the Insert → Header menu, then align the page number to the right.
Once these defaults are in place, you can lock them in as a template if you anticipate using APA again.
Master the Title Page
The title page is often the first thing reviewers glance at, so let’s get it right:
- Center everything horizontally and vertically (use Layout → Vertical Alignment → Center).
- Include, in order, the title, your name, and your institutional affiliation. Each line should be double‑spaced.
- For professional papers, add the author note beneath the affiliation; for student papers, you may need course info, instructor name, and due date.
Tip: Highlight the whole title block and apply the “Center” alignment button to avoid accidental left‑justified text.
Craft Smooth Headings
APA 7th edition uses five heading levels, each with its own style. Word’s built‑in heading styles can be customized to match the APA look, which also helps with automatic table‑of‑contents generation.
Level 1 – Centered, Bold, Title Case
Modify the Heading 1 style: center alignment, bold, and capitalize major words. No extra spacing before or after.
Level 2 – Left‑Aligned, Bold, Title Case
Adjust Heading 2 to left alignment, bold, same title‑case rules.
Level 3 – Left‑Aligned, Bold, Italic, Title Case
For Heading 3, add italic formatting on top of bold.
Level 4 – Indented, Bold, Sentence case, Ending with a period.
Set Heading 4 to a hanging indent (0.5 in), bold, sentence case, and remember the period.
Level 5 – Indented, Bold, Italic, Sentence case, Ending with a period.
Combine the tweaks from Level 4 with italic styling for Heading 5.
Once you’ve updated these styles, simply apply them as you write—Word will keep the formatting consistent without you needing to redo anything.
Reference List Made Simple
The reference list is where meticulous details shine. Follow these steps to let Word handle most of the heavy lifting:
- Turn on the built‑in citation manager: References → Insert Citation → Add New Source. Choose “APA 7th” from the style dropdown.
- Enter all required fields (author, year, title, etc.). Word will auto‑format the entry when you insert it into the bibliography.
- For a hanging indent, highlight the reference list, right‑click, choose Paragraph, then set “Special → Hanging” to 0.5 in.
- Double‑space the whole list, but keep a single blank line between entries.
If you need to tweak a citation (say, add a DOI), edit the source in the citation manager; the changes propagate instantly.
Tables, Figures, and Captions
Visuals require a bit of extra attention:
- Place each table or figure on the same page as its first mention, if possible.
- Number them sequentially (Table 1, Figure 1) and use a concise, italicized title below the number.
- For tables, enable “Header Row” in the Table Design tab; Word will repeat the header if the table spans pages.
- Keep the caption text in 12‑pt, double‑spaced, and left‑aligned.
A quick way to keep captions uniform is to create a custom style named “APA Caption” and apply it whenever you insert a new label.
Footnotes, Endnotes, and In‑Text Citations
APA 7th edition generally discourages footnotes, but they’re acceptable for content‑related notes. Here’s how to stay compliant:
- Insert a footnote via References → Insert Footnote.
- Set the footnote text to the same 12‑pt Times New Roman, double‑spaced.
- Avoid using footnotes for citation purposes; stick to parenthetical in‑text citations instead.
In‑text citations follow the author‑date format. Word’s citation tool inserts them automatically, but double‑check for cases like multiple authors (>20) or works without a date, where “n.d.” is required.
Polish with Proofing Tools
Before you hit “Submit,” give the document a once‑over with Word’s built‑in proofing features:
- Spelling & Grammar: Turn on “Check grammar with spelling” under File → Options → Proofing to catch stray commas or misplaced periods.
- Readability Statistics: Enable “Show readability statistics” to see if your prose meets the recommended 6‑8 grade level for most academic writing.
- Track Changes: If you’re collaborating, keep “Track Changes” on; reviewers will see exactly where formatting tweaks were made.
Save, Export, and Submit
When the paper is ready, save a master copy in .docx format. For submission, convert to PDF to lock in the layout:
- Go to File → Save As.
- Choose “PDF” from the file‑type dropdown.
- Check “Optimize for online publishing” to keep the file size reasonable.
Keep the original Word file handy in case the journal asks for a editable version later.