How to Locate and Replace the Oil Filter on a 2016 Mazda 3
When it comes to routine maintenance, the oil filter often gets overlooked until a warning light pops up. For owners of a 2016 Mazda 3, knowing exactly where that filter sits and how to change it can save both time and a trip to the shop. Below is a step‑by‑step guide that walks you through the process, highlights common pitfalls, and offers a few handy tips to keep your engine humming.
Why the Oil Filter Matters
The oil filter’s job is simple yet vital: it catches contaminants before they circulate through the engine. Over time, the filter media becomes saturated, reducing flow and potentially allowing grit to reach critical bearings. Replacing the filter at every oil change—typically every 5,000–7,500 km for a 2016 Mazda 3—helps maintain oil pressure and prolongs engine life.
Where the Filter Is Located
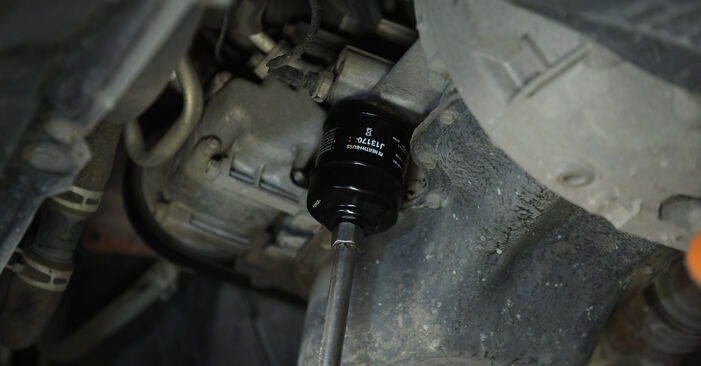
In the 2016 Mazda 3, the oil filter sits beneath the engine, accessible from the underside of the vehicle. Here’s a quick visual cue:
- Position: On the driver’s side, near the front of the engine block.
- Mounting: It’s screwed onto a short, threaded brass fitting.
- Visibility: You’ll usually need to remove a splash guard or plastic cover to see it clearly.
Because the filter is tucked away, a few preparation steps will make the job smoother.
Tools You’ll Need
- Oil filter wrench (or a strap wrench)
- Socket set (typically 17 mm for the drain plug)
- Drain pan
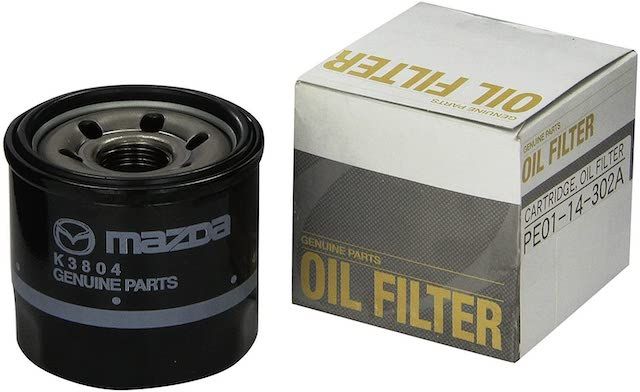
- New oil filter (Mazda‑approved or equivalent)
- Fresh engine oil (≈4.5 L, 5W‑30 synthetic recommended)
- Jack and jack stands or a set of ramps
- Gloves and shop rags
Step‑by‑Step Replacement Guide
1. Prepare the Vehicle
Park the Mazda 3 on a flat surface, engage the parking brake, and let the engine cool for at least 10 minutes. This prevents hot oil splashes and makes the oil settle for a cleaner drain.
2. Lift the Car
Position the jack under the front‑left jacking point, raise the car, and secure it on jack stands. If you have ramps, drive the car up until the front wheels are off the ground. Ensure the vehicle is stable before crawling underneath.
3. Drain the Old Oil
Place the drain pan beneath the oil pan’s bolt, then use the 17 mm socket to loosen and remove the plug. Let the oil flow out completely—this usually takes a few minutes. Once empty, reinstall the plug and tighten it to the manufacturer’s torque (≈30 Nm).
4. Locate and Remove the Filter
Slide under the engine and find the filter on the driver’s side. Slip the oil filter wrench over the metal canister, turn counter‑clockwise, and watch the filter loosen. It may be snug; a gentle rocking motion helps. When it comes free, be ready for a small amount of oil to spill out.
5. Prepare the New Filter
Before installing, dab a thin coat of fresh oil on the rubber gasket of the new filter. This ensures a proper seal and makes future removal easier. Also, check that the filter’s “M” or “MAZDA” mark faces upward—this indicates the correct orientation.
6. Install the New Filter
Hand‑tighten the filter until the gasket contacts the engine surface, then give it an additional three‑quarter turn. Avoid over‑tightening; the filter should be snug but not forced.
7. Refill with Fresh Oil
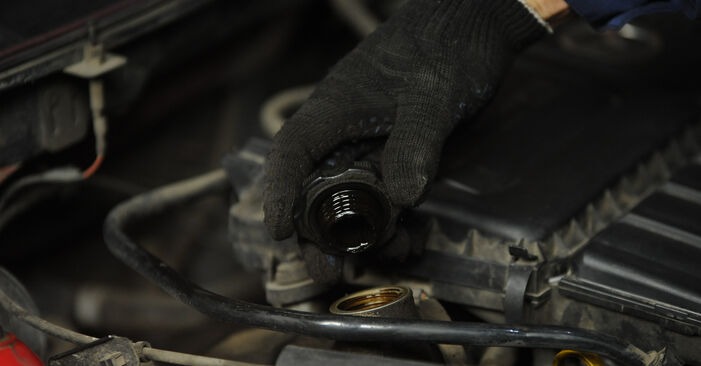
Open the hood, locate the oil filler cap, and pour in the specified amount of oil (check the owner’s manual for exact volume). Replace the cap, then start the engine for a few seconds. Look for any leaks around the filter and drain plug.
8. Check the Oil Level
Turn off the engine, wait a minute, then pull out the dipstick, wipe it clean, reinsert, and pull again. The oil should sit between the “Low” and “Full” marks. Add more if needed, but never exceed the “Full” line.
Common Mistakes to Avoid
- Skipping the oil drain. Trying to change the filter without draining reduces suction and can cause the old oil to splash everywhere.
- Forgetting to lubricate the gasket. A dry gasket may not seal properly, leading to leaks.
- Over‑tightening the filter. This can damage the threads and make future removal tricky.
- Using the wrong oil type. Mazda recommends 5W‑30 synthetic for optimal performance in the 2016 model.
Helpful Tips From Mazda Enthusiasts
Many owners report that placing a rag over the filter’s opening before removal catches stray oil and keeps the workspace tidy. Another trick is to mark the filter’s orientation with a piece of tape; this saves a moment of guesswork when installing the new one.
When to Seek Professional Help
If you notice persistent oil leaks after the job, hear unusual noises from the engine, or simply feel uncomfortable working under the car, it’s wise to let a qualified mechanic take a look. A quick inspection can prevent small issues from turning into costly repairs.