How to Master Manual Fiber Laser Welding: A Complete Guide
Manual fiber laser welding sits at the crossroads of precision engineering and hands‑on craftsmanship. Whether you’re stepping up from traditional TIG welding or fine‑tuning a production line, understanding the nuances can save hours of trial and error. Below we break down the essential concepts, practical set‑ups, and troubleshooting tips that seasoned welders swear by.
Why Choose Manual Fiber Laser Over Other Methods?
Fiber lasers deliver concentrated energy with minimal heat‑affected zones, making them ideal for thin‑walled alloys and intricate geometries. Compared to plasma or conventional arc welding, the beam’s focus can be adjusted on the fly, giving you real‑time control without swapping out hardware.
- Speed. Cutting and joining can often be completed in a single pass.
- Precision. Spot sizes as small as 50 µm allow for micro‑welds on delicate components.
- Material Flexibility. From high‑strength steels to copper alloys, fiber lasers handle a broad spectrum.
Core Components of a Manual Fiber Laser Setup
Getting the rig right is half the battle. A typical manual station includes:
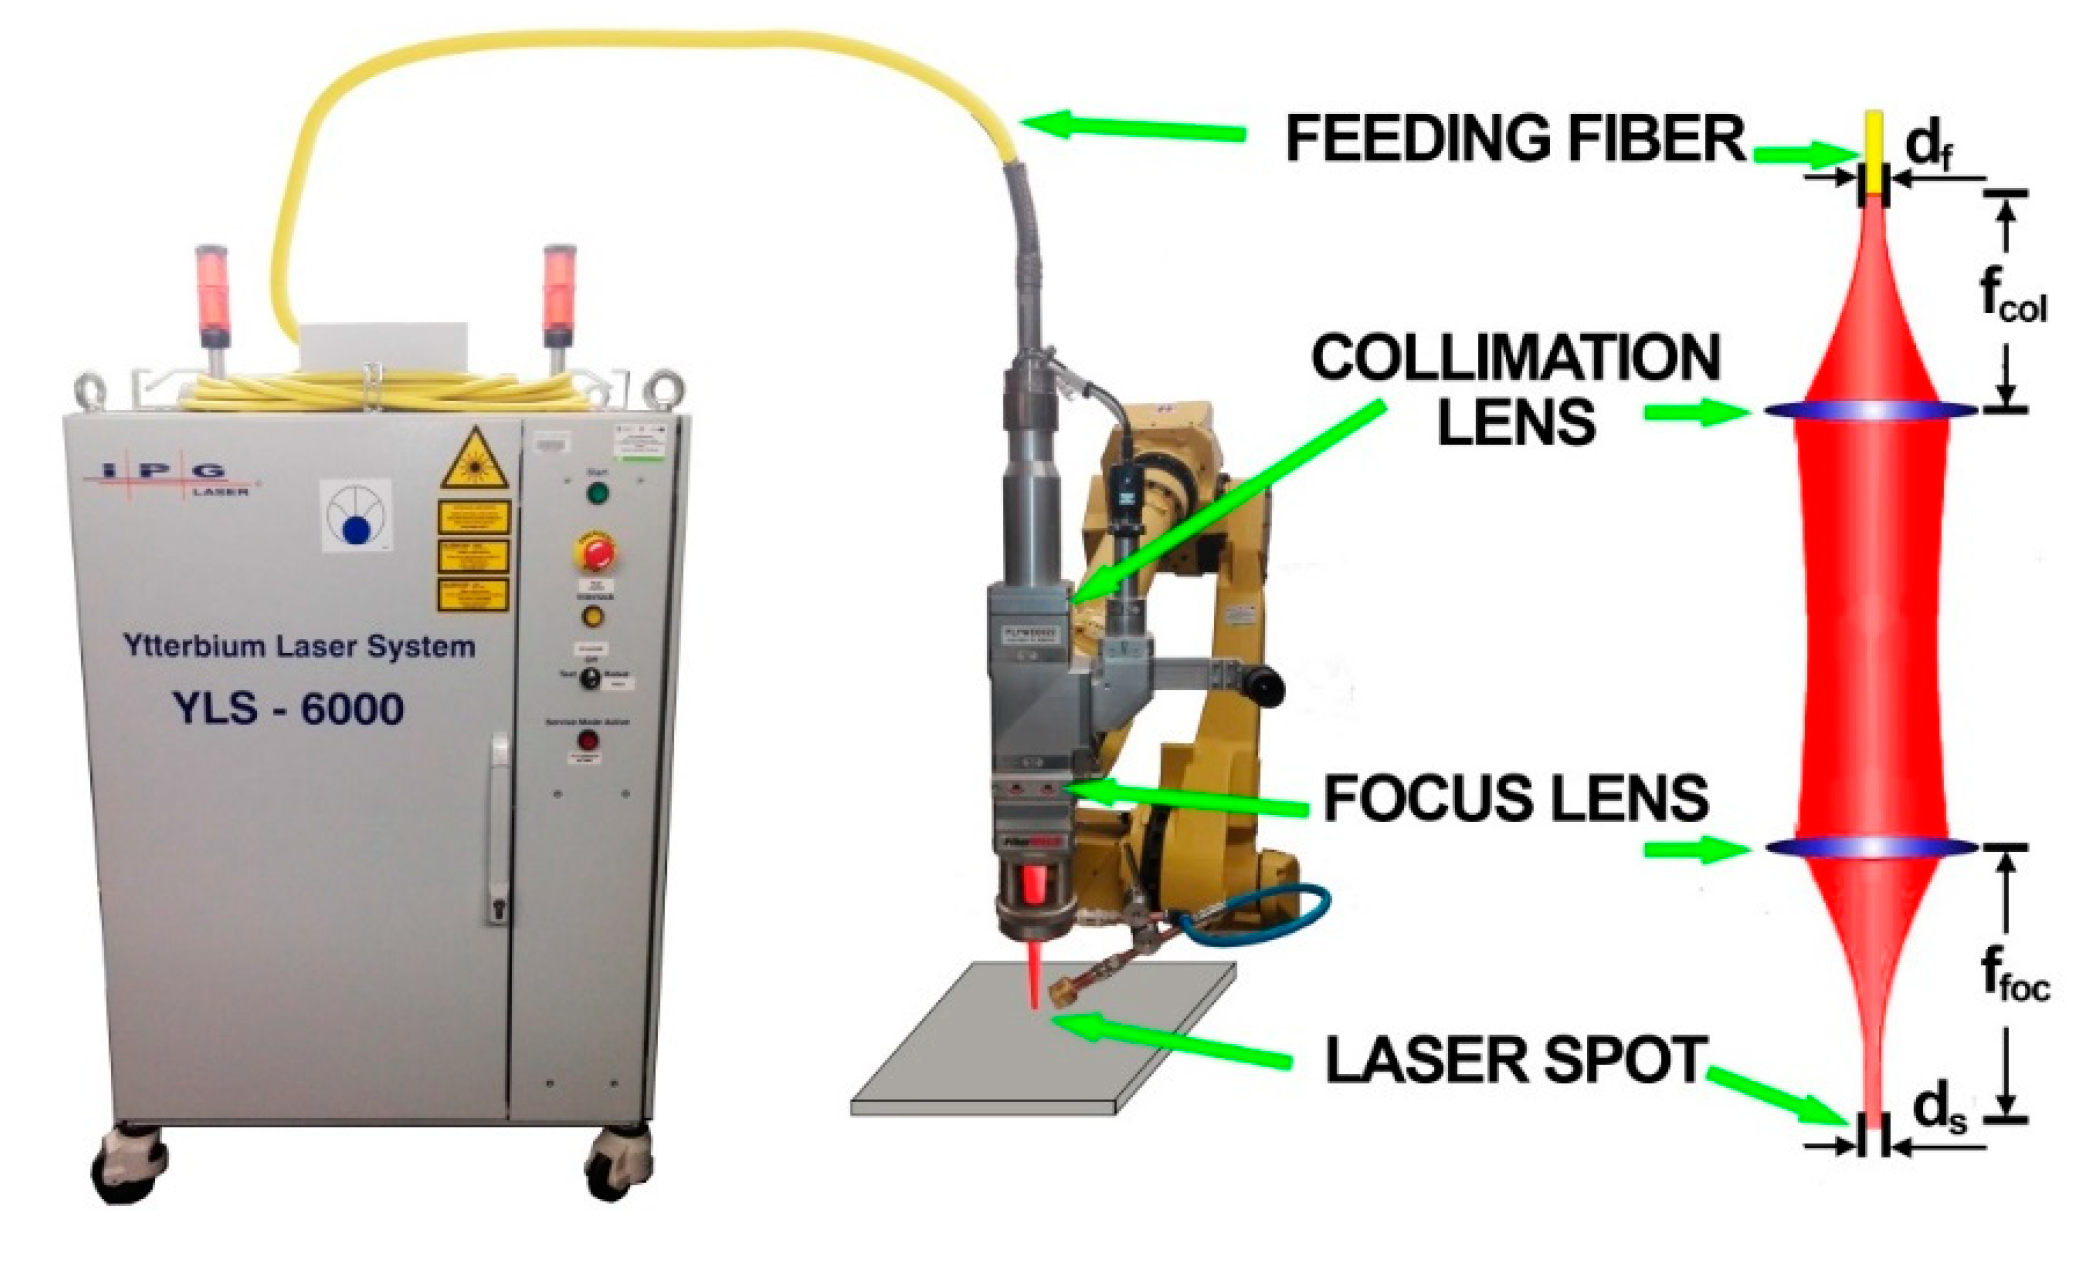
- Fiber Laser Source – Usually a diode‑pumped Ytterbium fiber delivering 1–5 kW.
- Beam Delivery Optics – Mirrors, lenses, and a focusing head that guide the beam to the workpiece.
- Welding Head – Often equipped with a coaxial camera for alignment.
- Motion Control – Manual sliders or a handheld rig that lets the operator steer the beam.
- Gas Supply – Argon, helium, or mixed shielding gases to protect the weld pool.
Each element influences the final bead quality, so don’t overlook the little things—like ensuring the fiber connectors are clean and free of dust.
Setting Up for Success
1. Prepare the Workpiece
Surface preparation remains crucial. Use a dedicated grinder or abrasive pad to remove oxides, then wipe the area with an alcohol‑based solvent. Even a thin film of oil can cause spatter or porosity.
2. Align the Beam
Place a low‑power test pulse on a scrap piece and adjust the focus until the spot diameter matches the target size on your gauge chart. Many operators find a slight “over‑focus” (spot a touch smaller than the intended width) yields a deeper penetration without widening the HAZ.
3. Choose the Right Shielding Gas
Argon works well for most steels, but copper alloys often benefit from a helium‑rich mix to improve heat input. Remember: gas flow rates of 10–15 L/min usually suffice; higher flow can disturb the melt pool rather than protect it.
4. Set Power and Speed
There’s no one‑size‑fits‑all table, but a good starting point is 1 kW at 100 mm/min for 1 mm‑thick stainless steel. From there, tweak either parameter by 10‑15% and watch the bead evolve. The key is to keep the melt pool continuous—no “dotted” welds.
Common Pitfalls and How to Avoid Them
- Over‑heating. If the beam lingers too long, the surrounding metal can turn brittle. Short, steady passes help.
- Mis‑aligned Focus. A drift of even 0.2 mm can widen the HAZ dramatically. Re‑check focus after every 20‑30 minutes of welding.
- Inadequate Shielding. Gaps in gas coverage often show up as tiny pores. Ensure the nozzle is snug and the gas flow is uninterrupted.
- Fiber Damage. Bends tighter than the manufacturer’s minimum radius cause micro‑cracks, leading to power loss. Use proper cable management.
Tips From the Field
Seasoned technicians often share tricks that don’t appear in manuals:
- Wrap a thin heat‑resistant tape around the nozzle to reduce spatter sticking.
- Employ a low‑magnification head-mounted camera for “eyes‑on” welding—especially useful for hidden joints.
- Keep a spare fiber connector handy; a quick swap can rescue a day of downtime.
- When welding dissimilar metals, start with the more reflective material to gauge the correct power setting.
Safety Considerations You Can’t Ignore
Fiber lasers emit invisible infrared radiation, which can damage eyes and skin without warning. Always wear:
- Laser‑rated safety goggles tuned to the wavelength (usually 1080 nm).
- Heat‑resistant gloves for handling hot workpieces.
- Protective clothing that covers exposed skin.
Ventilation is another silent hero; the process can generate metal fumes that, over time, pose respiratory risks.
Maintaining Your Manual Fiber Laser System
Routine care extends both performance and lifespan. A quick checklist after each shift:
- Inspect fiber ends for cleanliness; clean with isopropyl alcohol and a lint‑free wipe.
- Verify gas line connections for leaks.
- Run a low‑power calibration test to confirm power output.
- Log any drift in focus or power; trends often signal upcoming component wear.
Every 6–12 months, schedule a professional service to check the pump diodes and replace worn optics.
When to Move From Manual to Automated
If you find yourself repeating the same weld patterns dozens of times a day, automation can boost repeatability and reduce fatigue. However, the transition isn’t merely about adding a robot; you must also program motion paths, synchronize gas flow, and calibrate the laser for the new dynamics. Many shops start with a hybrid approach—manual for complex joints, automated for straight runs.
In the end, mastering manual fiber laser welding is a blend of science and feel. The equipment provides the precision; the operator supplies the judgment. By respecting the fundamentals, fine‑tuning the parameters, and staying diligent about safety, you’ll produce joints that stand up to the toughest applications.