How to Optimize PPSSPP for Ultra‑High Graphics: Pro Settings Guide
Ever wondered why some PSP games look almost like modern titles when you run them on PPSSPP? The secret isn’t a magic patch—it’s all about dialing in the right settings. Below is a hands‑on walk‑through that shows you how to push the emulator to its visual limits without completely breaking performance.
Why High‑Quality Settings Matter
PPSSPP is more than a simple play‑and‑forget emulator. By tweaking its graphics options you can:
- Reveal details that were invisible on the original handheld screen.
- Improve color depth, making environments feel richer.
- Stretch textures so they look sharper on modern displays.
That said, cranking every knob to max can drain your CPU and cause stutters. The goal is to find a sweet spot that feels smooth and looks spectacular.
Getting Started: Install PPSSPP and the Pro Mod
If you haven’t already, grab the latest PPSSPP build from the official site. The “Pro Mod” isn’t a separate download—it’s a collection of enhanced settings and shaders that you’ll enable inside the emulator.
Step‑by‑step setup
- Download and extract the PPSSPP APK (Android) or zip (Windows/macOS).
- Launch the app and head to Settings > Graphics.
- Locate the Shader Cache switch and turn it on – this alone speeds up later tweaks.
- Enable Developer Options under System to unlock hidden features like Texture Scaling.
Once these basics are in place, you’re ready for the pro‑level adjustments.
Core Graphics Tweaks
The following settings are the backbone of a high‑resolution experience. Adjust them gradually and test with a familiar game, such as Persona 3 Portable or God of War: Ghost of Sparta.
Resolution and Scaling
- Internal Resolution: Set to 4× or 8× the native 480×272. The higher the number, the sharper the image, but also the heavier the load.
- Texture Scaling: Enable and choose “Nearest” for pixel‑art titles, or “Linear” for smoother textures. Some games benefit from “Anisotropic Filtering (4×)”.
Shader Enhancements
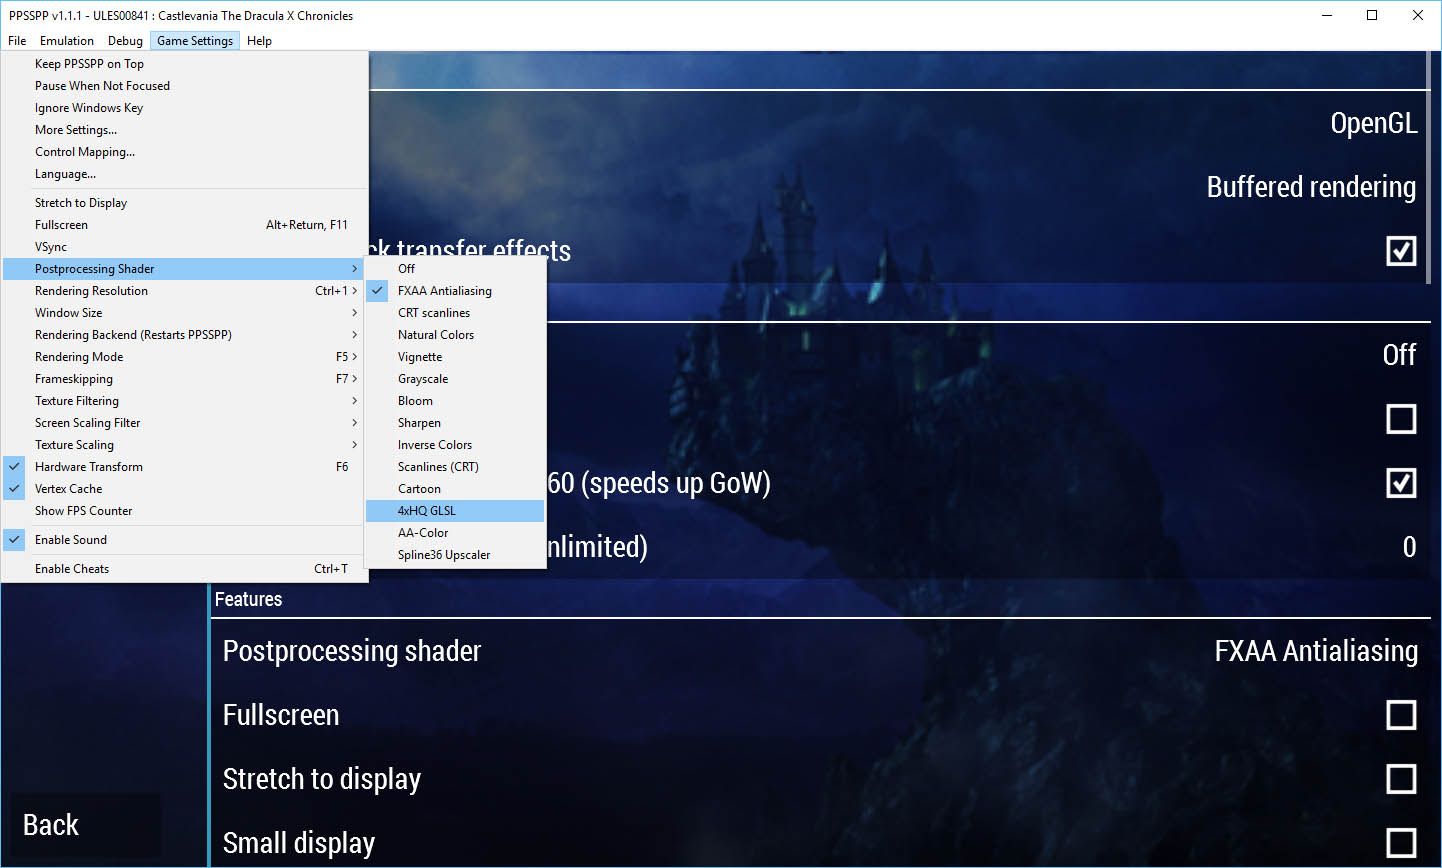
- Post‑Processing Shader: Pick “FXAA” for a subtle anti‑aliasing without a big performance hit.
- Bloom: Turn it on for dreamy lighting effects, but dial back to “Low” if you notice frame drops.
- Depth of Field: Useful in games with cutscenes; set to “Medium” for balance.
Color and Lighting
- Color Depth: Switch from 16‑bit to 32‑bit if your device can handle it; colors become markedly richer.
- Disable “Enhancement” if you experience flickering—sometimes the emulator’s auto‑enhance clashes with custom shaders.
When you finish a round of tweaks, press Back to apply and immediately observe any visual upgrades. It’s normal to see a brief “glitch” as new textures load; that’s just the cache building.
Performance vs Quality Trade‑offs
Not every device can sustain 8× resolution with full shader packs. Here’s a quick guide to scaling down gracefully.
When to lower settings
- If frame rates dip below 30 fps during combat scenes, drop the internal resolution to 3×.
- For heavy shader effects like Bloom, set the intensity to “Low” or turn it off entirely.
- When battery life matters (on mobile), switch to “Power‑Saving” mode under System > Power Saving.
Balancing act checklist
- Start with Resolution at 4×.
- Add FXAA and Color Depth 32‑bit.
- Test a demanding level; if it stalls, reduce Bloom to “Off”.
- Fine‑tune Texture Scaling based on texture clarity.
Remember, the “best” setting is personal. Some gamers love buttery‑smooth performance; others chase every pixel of fidelity.
Saving and Applying Your Settings
Once you’ve landed on a configuration that feels right, you don’t want to redo the whole process every time you launch a game.
- Go to Settings > Configuration and tap Save Configuration. This writes your tweaks to
ppsspp.cfg. - If you have multiple setups (e.g., “High‑Detail” vs “Battery‑Saver”), duplicate the config file and rename it accordingly.
- To switch quickly, use the Quick Settings overlay (available on Android) and select your saved profile.
Pro tip: Keep a text backup of the ppsspp.cfg file. If an update resets your preferences, you can just paste the old version back in.
Troubleshooting Common Issues
Even with the right settings, hiccups happen. Below are the most frequent roadblocks and how to fix them.
Game crashes after enabling shaders
Turn off the Post‑Processing Shader temporarily. Some titles have built‑in shaders that conflict with PPSSPP’s. Once the game runs, slowly re‑enable individual effects to identify the culprit.
Texture distortion at high scaling
Switch the Texture Scaling method from “Linear” to “Nearest”. This preserves the original pixel art look while still boosting resolution.
Audio desync
Navigate to Audio > Audio Backend and select “OpenSL” instead of “AudioTrack”. Many users report smoother sync at higher graphics settings.
Stuttering on low‑end devices
Reduce the internal resolution to 2× and disable all extra shaders. Then, enable “Fast CPU” under System > CPU for a modest speed bump.
With these adjustments in place, you should be able to enjoy PSP classics looking fresher than ever while keeping the gameplay buttery smooth.