How To Tune And Repair Your KTM LC4 640 Carburetor
If you’ve ever felt that your 640‑cc KTM isn’t pulling its weight on the trail, chances are the carburetor is whispering for attention. The LC4 series is beloved for its punchy response, yet a slightly off jet or a clogged needle can mute that character in an instant. Below is a practical walk‑through that blends the basics with a few seasoned‑rider tricks, so you can coax the engine back to life without a trip to the shop.
Understanding the LC4 640 Carburetor Basics
The LC4 640 uses a single‑body, constant‑velocity (CV) carburetor with three main adjustment knobs: idle speed, idle mixture, and main jet. The CV slide—often called the “throttle valve”—smooths power delivery by responding to vacuum rather than direct lever movement. Knowing what each part does saves you from chasing symptoms that aren’t really related.
- Idle Speed Screw: Sets the engine’s rpm when the throttle rests.
- Idle Mixture Screw: Controls the fuel‑air blend at idle, affecting warm‑up and low‑speed stability.
- Main Jet: Governs fuel flow at higher throttle openings; swapping it changes the overall richness.
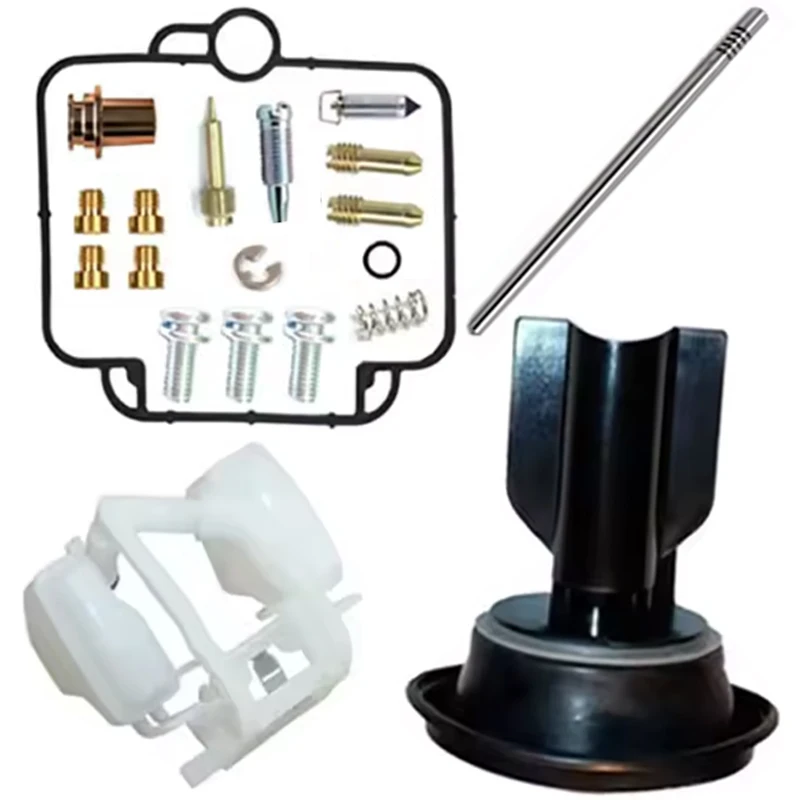
Beyond the knobs, the diaphragm, float bowl, and needle valve form a delicate ecosystem. A leak in the diaphragm, for instance, can masquerade as a lean condition, while a worn needle tip may cause a sluggish surge.
Common Symptoms of a Mis‑Tuned Carburetor
Before you start unscrewing anything, watch for these tell‑tale signs. A quick visual check—clean spark plug, fresh fuel, and proper air filter—often rules out other culprits.
- Engine stalls or hesitates when you roll off the throttle.
- Rough idle that shudders at 1,000‑1,200 rpm.
- Excessive smoke from the exhaust, especially at low revs.
- Loss of top‑end power after a few minutes of riding.
- “Flat‑spot” feeling as you twist the throttle past the first notch.
If you notice more than one of these, a carburetor tune‑up is probably the next logical step.
Step‑by‑Step Tuning Procedure
Grab a set of flat‑head screwdrivers, a feeler gauge, and a clean rag. You’ll need the carburetor removed from the bike; a service manual is handy, but most riders manage with a few common tools.
- Detach and Clean – Remove the carburetor, spray carburetor cleaner into all passages, and let it dry. Pay special attention to the venturi and pilot jet holes; residue here can skew your adjustments.
- Inspect the Diaphragm – Look for cracks or stiff spots. If the diaphragm doesn’t flex smoothly, replace it before proceeding.
- Set Idle Speed – With the engine warm, turn the idle speed screw until the rpm hovers around the manufacturer’s specification (usually ~1,250 rpm). Slightly higher may aid cooling; a bit lower can improve fuel economy.
- Adjust Idle Mixture – Turn the idle mixture screw clockwise until you feel resistance (about 1½ turns from fully closed), then back out 1¼ turns. Fire up the engine and listen: if it sputters, turn the screw a tiny notch richer; if it dies quickly, lean it a notch.
- Check Main Jet – If you’ve swapped jets before, double‑check the installed size. For a stock 640‑cc engine, a 120‑size jet is typical, but altitude and rider weight may call for a ±5 variation.
- Test Ride – Take the bike for a short ride. Focus on throttle response at low, mid, and high RPMs. If there’s still a flat‑spot, consider fine‑tuning the main jet or inspecting the needle valve.
- Fine‑Tune the Needle – The needle moves in the slide and has several setbacks. Raising the needle (more fuel) helps mid‑range power; lowering it (less fuel) smooths the idle. Small adjustments (½ turn) are enough.
Throughout the process, write down each setting. That habit makes it easier to revert if a change worsens performance.
Repair Tips and When to Replace Parts
Cleaning can only do so much. Some wear patterns are unmistakable.
- Leaking Float Bowl – If fuel drips from the bowl when the carb is upright, the float valve seat may be damaged. Replacement is cheaper than a full rebuild.
- Corroded Jets – A tinny, orange hue indicates oxidation. Lightly sand the jet opening with fine grit, then polish with a carburetor‑specific cleaner.
- Sticky CV Slide – Apply a thin coat of silicone‑based spray to the slide’s guide rails. Avoid petroleum products; they can degrade the rubber diaphragm.
- Worn Needle Tip – A blunted tip reduces fuel flow at mid‑throttle. If you notice consistent mid‑range lean, swapping the needle is the quickest fix.
When in doubt, consult the service manual’s torque specs and part numbers. A correctly torqued throttle cable, for example, prevents the slide from binding and mimics an “over‑rich” symptom.
Maintenance Checklist for Longevity
Regular attention can keep the carburetor humming for years.
- Inspect the air filter every 300 km; a clogged filter forces the carb to run richer.
- Flush the carburetor with cleaner at the start of each season, especially if the bike sat idle for months.
- Replace the fuel filter quarterly; debris upstream will foul the jets.
- Check the throttle cable free play; excess slack reduces the CV slide’s precision.
- Verify spark plug colour after each major tune‑up; a tan‑brown hue signals optimal mixture.
Doing these checks during routine service intervals adds only a few minutes but can spare you a frustrating breakdown on the trail.
With a little patience and the right tools, the KTM LC4 640 carburetor will reward you with the crisp, controllable power it’s famed for. Happy riding, and may every throttle pull feel just right.