How to Turn Off Hardware Acceleration in Microsoft Teams
What hardware acceleration actually does
When you launch Teams, the app tries to lean on your graphics processor to render video, screen sharing, and animations faster. That shortcut is called hardware acceleration. In theory it reduces CPU load and makes the interface feel snappier, but the reality can be messier. Out‑of‑date drivers, conflicting GPU settings, or simply a low‑end graphics card can turn that “speed boost” into stutter, frozen screens, or a blurry video feed. Knowing when and how to disable the feature can save you a lot of head‑scratching during a busy meeting.
Scenarios where disabling makes sense
Most users never need to touch this setting, yet a few common situations call for a quick toggle:
- Frequent video freezes – If you notice lag every time someone shares their screen, the GPU may be struggling to keep up.
- Audio‑video sync problems – A desynced voice and picture often points to a misbehaving hardware‑acceleration pipeline.
- Compatibility with remote desktops – Virtual machines sometimes lack proper GPU pass‑through, making Teams’ default mode unstable.
- Older Windows versions – Windows 10 builds prior to the 20H2 update have known glitches with Teams’ rendering path.
In any of these cases, turning the feature off usually restores the smooth, predictable behavior you expect from a collaboration tool.
Step‑by‑step guide for the desktop client
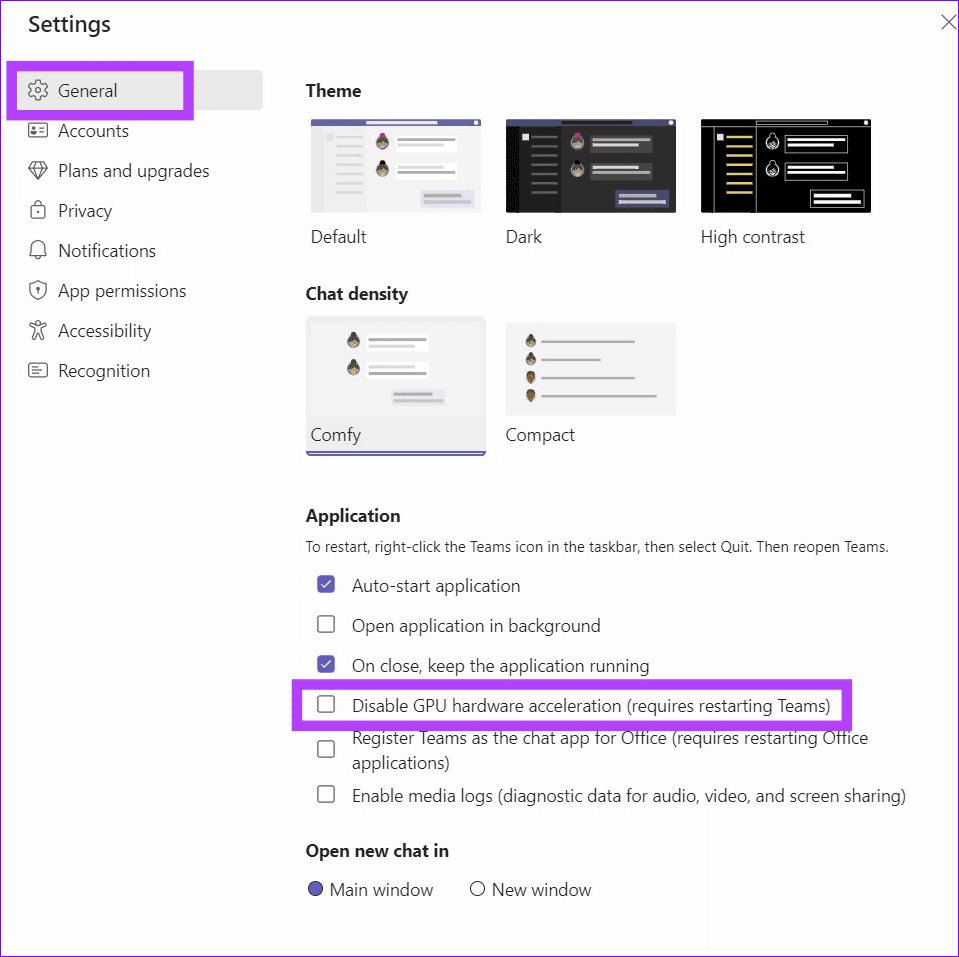
- Open Teams and head to Settings – Click your profile picture in the top‑right corner, then choose Settings from the dropdown.
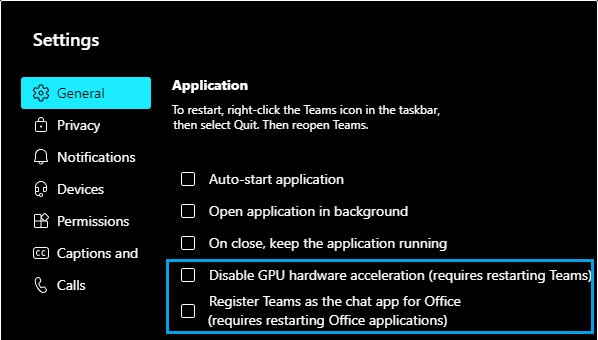
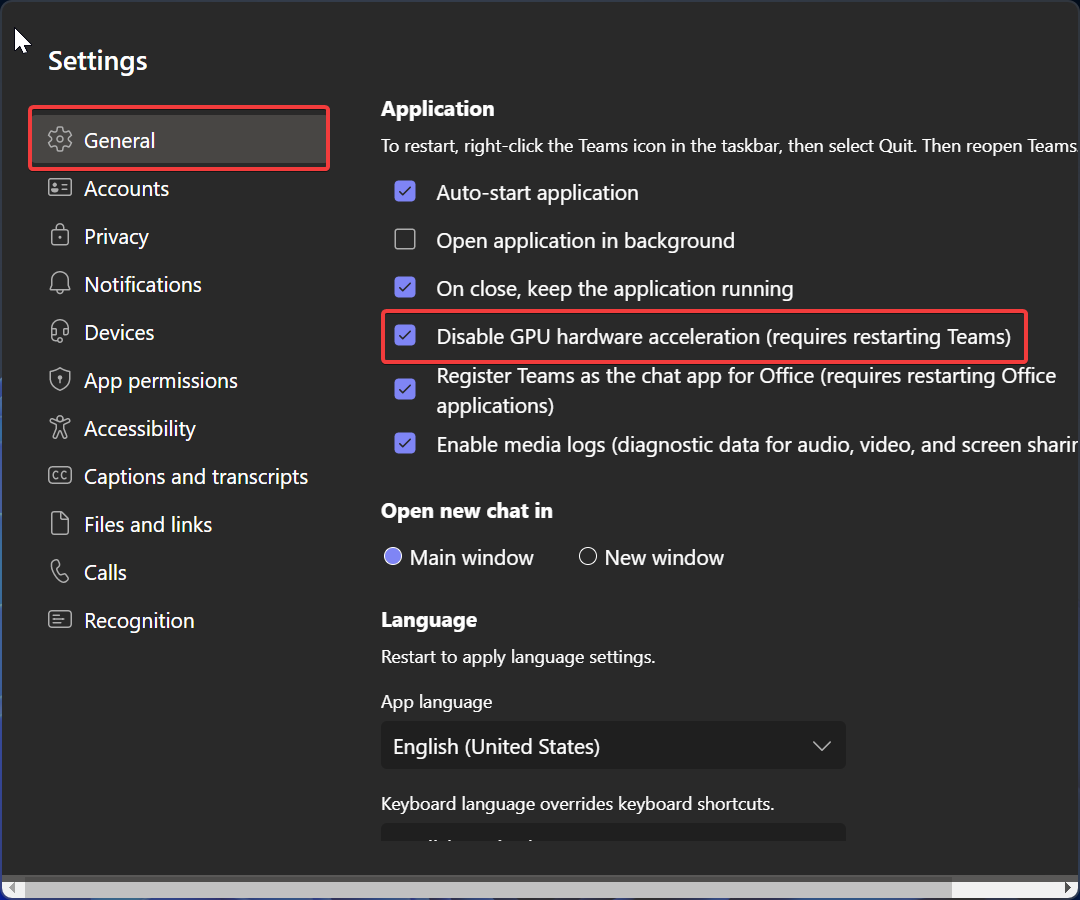
- Find the “General” tab – It’s the first pane on the left. Scroll down until you see the Application section.
- Locate “Disable hardware acceleration” – There’s a single checkbox labeled exactly that. Tick it.
- Save and restart – Teams will prompt you to restart the app. Click Restart now so the new rendering mode takes effect.
After the restart, Teams will rely on software rendering. You may notice the UI feels a touch heavier, but video playback and screen sharing should be steadier, especially on modest hardware.
How to make the change in the web version
The browser version respects a similar setting, but you’ll need to adjust a hidden flag rather than a visible checkbox. Here’s a quick rundown for Chrome and Edge, the two browsers Microsoft officially supports for Teams:
- Open the browser’s flags page – Type
chrome://flagsoredge://flagsinto the address bar and press Enter. - Search for “hardware acceleration” – Use the page’s search box to locate the flag named “Override software rendering list.”
- Disable the flag – Change its dropdown from “Default” to “Disabled.”
- Relaunch the browser – A button appears at the bottom of the page; click it to restart.
- Log back into Teams – The web app will now run without GPU‑assisted rendering.
Because you’re altering a browser‑wide setting, any other web app that relies on hardware acceleration will also fall back to software rendering. If you notice sluggishness elsewhere, you can toggle the flag back on after you finish using Teams.
Troubleshooting tips after you’ve disabled it
- Check for driver updates – Even with hardware acceleration off, outdated graphics drivers can still cause visual glitches.
- Clear Teams cache – Close the app, navigate to
%appdata%\Microsoft\Teams, delete the contents of theCachefolder, then restart. - Test with a fresh profile – Sign out, then sign back in on a different Windows account to rule out profile‑specific corruption.
- Monitor CPU usage – Software rendering leans more on the processor. If CPU spikes to 80 % or higher during a call, consider closing background apps or upgrading hardware.
When to re‑enable hardware acceleration
If you have a modern GPU and the latest drivers, you’ll likely get the best experience with the feature turned on. After you’ve confirmed the underlying issue is resolved—perhaps by updating drivers or fixing a remote‑desktop configuration—simply revisit the Settings page and uncheck the “Disable hardware acceleration” box. Restart, and you’ll be back to the smoother, GPU‑accelerated workflow.
FAQ
- Will disabling hardware acceleration affect video quality? Generally no. The video codec stays the same; only the rendering path changes. In many cases the picture actually looks clearer because frames aren’t dropped.
- Is there a way to disable it for just one meeting? Not directly. The setting is global for the app, so you’ll need to toggle it before the call starts and turn it back on afterward if you prefer.
- Does this work on the Teams mobile app? The mobile versions manage rendering internally and don’t expose a hardware‑acceleration switch. If you experience issues on a phone, updating the app or the OS is the recommended fix.
- Can I automate the change with a script? Yes. For the Windows desktop client, adding the registry key
HKCU\Software\Microsoft\Office\Teams\DisableHardwareAccelerationwith a DWORD value of 1 forces the setting without opening the UI.