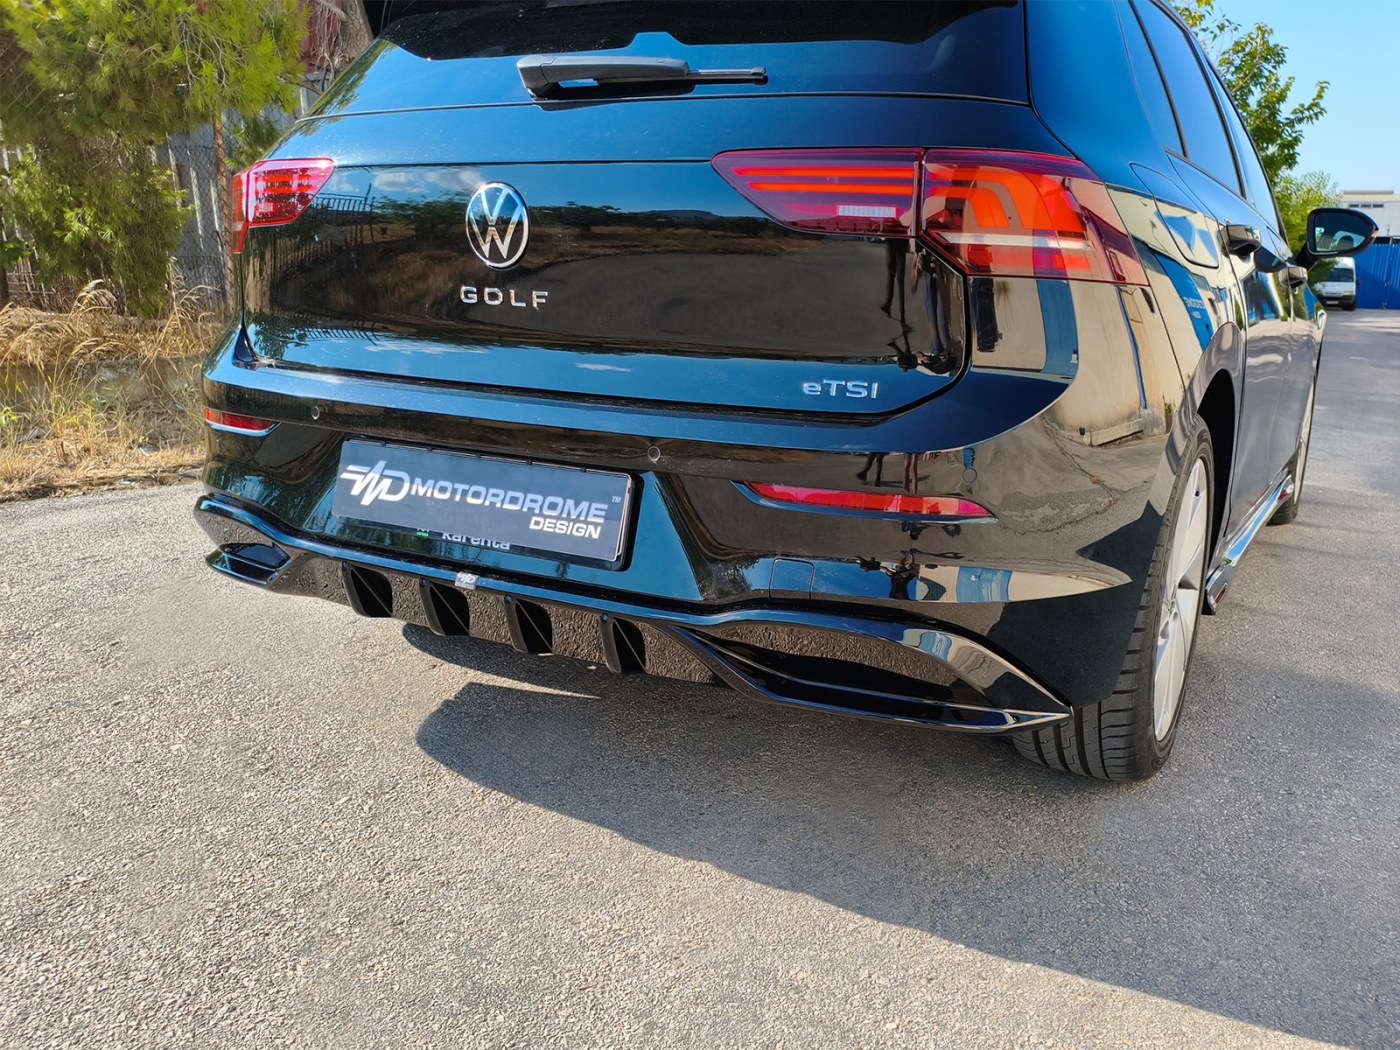
How to Upgrade Your MK8 GTI Clubsport with a Rear Diffuser
When you first laid eyes on the MK8 GTI Clubsport, the aggressive front fascia and the promise of track‑ready performance probably grabbed your attention. Yet many owners overlook one subtle yet powerful modification: the rear diffuser. Swapping the stock piece for an aftermarket unit can sharpen downforce, tidy up the underbody flow, and give the car a more purposeful look. Below is a hands‑on guide that walks you through the why, the what, and the how of fitting a rear diffuser to your Clubsport.
Why a Rear Diffuser Matters
Even though the GTI Clubsport is already tuned for grip, the rear end still suffers from turbulent air that can lift the chassis at high speed. A well‑designed diffuser works by:
- Accelerating airflow underneath the car, creating a pressure differential that pushes the rear down.
- Reducing drag by smoothing the transition between the underbody and the rear deck.
- Providing an aesthetic cue that signals “track‑focused” to onlookers.
In real‑world terms, owners report a firmer rear end during aggressive cornering and a slight boost in straight‑line stability—without adding weight or sacrificing fuel economy.
Choosing the Right Diffuser
Not every diffuser will fit the MK8 GTI Clubsport perfectly. Here are the key factors to evaluate before you buy:
Material
Carbon‑fiber units are lightweight and visually striking, while ABS composites are more budget‑friendly and easier to paint. Fiberglass sits in the middle, offering decent rigidity at a modest price.
Design Compatibility
Look for kits that specify “OEM‑fit for MK8 GTI Clubsport.” This ensures the mounting points line up with the factory brackets, and you won’t need to drill new holes.
Downforce Rating
Manufacturers often quote a downforce figure at 150 km/h. While the numbers are approximate, a higher rating generally translates to more noticeable grip gains.
Tools and Preparation
Before you pop the trunk, gather the following basics:
- Socket set (10 mm and 12 mm)
- Torx bits (T20, T25)
- Flat‑head screwdriver
- Plastic trim removal tools
- Masking tape and a clean rag
- Optional: a torque wrench (to hit factory specs)
Give the rear bumper a quick wash, then dry it thoroughly. Any grime left on the mounting surfaces can lead to uneven clamping later on.
Step‑by‑Step Installation
1. Remove the Stock Diffuser
Open the trunk and locate the two lower bolts that secure the factory diffuser to the rear bumper. Unscrew them with the appropriate socket, then gently pull the diffuser forward. If there are any plastic clips, release them with a trim tool to avoid cracking.
2. Clean the Mounting Area
Use a mild degreaser on the bumper’s underside, focusing on the bolt holes. Wipe dry with a lint‑free cloth. This step is the easiest way to prevent rattles down the road.
3. Align the New Diffuser
Position the aftermarket unit over the mounting points. Most kits include alignment tabs—make sure these sit flush with the bumper. A quick visual check should reveal any gaps; if you see them, adjust the diffuser until it sits evenly.
4. Fasten the Bolts
Insert the supplied hardware (often stainless steel for corrosion resistance) and hand‑tighten. Then, using a torque wrench, apply the manufacturer’s recommended torque—usually around 8 Nm for the lower bolts and 5 Nm for any side mounts.
5. Re‑attach Trim and Accessories
If your GTI has a rear spoiler or a diffuser‑integrated brake light, reconnect those wiring harnesses now. Clip any side skirts or lower bumper guards back into place, taking care not to overtighten the plastic clips.
6. Final Inspection
Step back and look at the rear profile from a low angle. The diffuser should blend seamlessly with the bumper line. Perform a quick “wiggle test” on the bolts—there should be no movement. Finally, give the surface a light wipe to remove fingerprints.
What to Expect After the Upgrade
Most drivers notice a subtle change right away:
- More planted feeling when accelerating out of a corner.
- Reduced rear‑end lift at highway speeds, especially in crosswinds.
- A cleaner rear silhouette that matches the car’s overall sporty character.
For those who take the car to a track day, the diffuser can shave a few tenths off lap times—largely thanks to increased rear stability under braking and cornering loads.
Maintenance Tips
Because the diffuser sits exposed to road grime, a quick rinse with water after a dusty drive is advisable. Avoid harsh chemicals that could damage carbon‑fiber finishes; a mild car shampoo will do the trick. Periodically check the bolts for any signs of loosening, especially after spirited driving sessions.
Is It Worth the Investment?
The price range for a quality rear diffuser runs from $150 to $500, depending on material and brand. When you weigh that against the modest gains in handling and the visual upgrade, many owners find it a bargain. Plus, it’s a reversible modification—if you ever decide to sell the car, you can simply reinstall the stock part and retain the original condition.
In short, adding a rear diffuser to your MK8 GTI Clubsport is a relatively easy, cost‑effective way to tighten up the car’s rear aerodynamics and give it a more purposeful look. With the right tools, a bit of patience, and attention to detail, you’ll be back on the road (or track) feeling that extra pinch of confidence that only a well‑tuned rear end can provide.