Navigating Your Certificate of Occupancy: A Complete Guide
What Exactly Is a Certificate of Occupancy?
A Certificate of Occupancy, often abbreviated as CO, is the city’s formal sign‑off that a building is safe and suitable for its intended use. It confirms that construction complies with approved plans, zoning rules, fire codes, and all other applicable regulations. Without it, owners typically cannot legally rent, sell, or even move into a space.
Think of the CO as the final “all clear” from the building department. It doesn’t guarantee that a property will appreciate in value, but it does guarantee that, at the moment of issuance, the structure meets minimum safety standards.
When Do You Need One?
Most jurisdictions require a CO before a building is occupied for the first time. However, there are several scenarios where a fresh certificate becomes necessary:
- Converting a warehouse into residential lofts.
- Adding a new floor or expanding an existing footprint.
- Changing the building’s classification—from office to restaurant, for example.
- Completing a major remodel that alters egress routes or fire‑suppression systems.
Even minor alterations, such as adding a new bathroom, might trigger a CO requirement if they affect the code‑required number of fixtures per occupant.
Key Steps to Secure Your CO
1. Verify Permit Closure
Before you can request a CO, every construction permit tied to the project must be marked “closed” by the relevant agencies. That means inspections for framing, electrical, plumbing, and fire protection are all signed off.
2. Schedule the Final Inspection
Contact the local building department to arrange the final walk‑through. Bring copies of all approved plans, permits, and any “as‑built” drawings that show what was actually constructed.
The inspector will check for obvious compliance issues—proper stair dimensions, functioning smoke detectors, adequate egress signage, and so on. If something is off, you’ll receive a punch‑list of items to correct.
3. Address Punch‑List Items Promptly
Minor fixes, like adjusting a handrail height, are usually resolved within a few days. More substantial items—perhaps a missing fire alarm zone—might require a re‑inspection, which can add weeks to the timeline.
4. Submit the CO Application
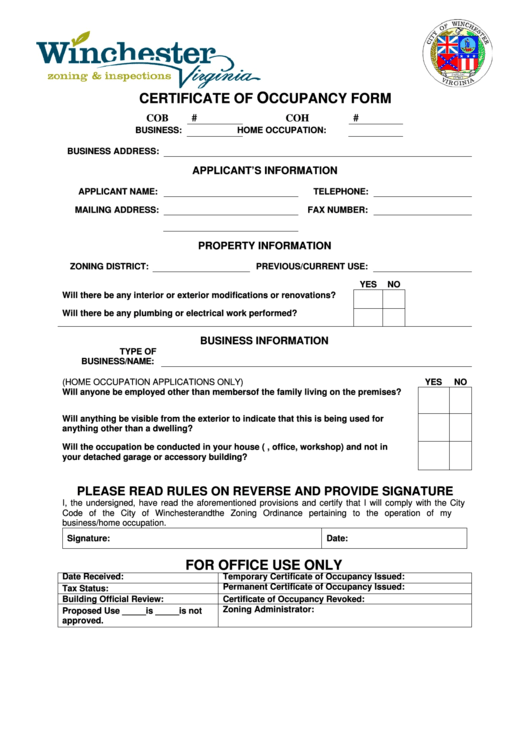
Once the inspector signs off, fill out the CO application form. Many municipalities now accept online submissions, but you’ll still need to attach the inspection reports and any required fees.
5. Receive and Preserve the Certificate
When the CO is issued, keep both a digital copy and the original paper in a safe place. Lenders, insurance carriers, and future buyers will all want to see it.
Common Pitfalls and How to Avoid Them
First‑time owners often overlook the importance of “as‑built” documents. If the final construction deviates from the original plans without official amendments, the CO can be withheld indefinitely. Always file any change orders with the building department as they happen.
Another frequent snag is neglecting accessibility requirements. Even if a building isn’t publicly open to the public, the ADA (or local equivalent) can still apply to certain features like restroom stalls or stair lifts.
Lastly, don’t assume that a CO is a permanent shield. If you later modify the space without permits—say, knocking down a non‑load‑bearing wall—the original certificate may become invalid, and you could face fines.
What a CO Means for Buyers and Tenants
For prospective buyers, a clean CO is proof that the property was legally completed. It eases the due‑diligence process and can affect financing terms; lenders often refuse mortgages on structures lacking a valid CO.
Tenants benefit too. A CO assures them that the landlord has met safety standards, which can influence insurance premiums and liability coverage. In many states, landlords cannot legally evict a tenant for non‑payment of rent if the building lacks a CO.
Special Cases: Historic Buildings and Mixed‑Use Projects
Historic structures sometimes qualify for exemptions or alternative compliance paths. Preservation boards may allow older stair widths or ceiling heights if they’re deemed “character‑defining.” However, safety systems like sprinklers are usually non‑negotiable.
Mixed‑use developments—think ground‑floor retail with apartments above—require separate COs for each occupancy type. The commercial portion might need a higher fire‑rating than the residential section, so be prepared for multiple inspections.
Cost Considerations
Fees vary widely by jurisdiction and project size. A small residential remodel might cost a few hundred dollars, while a multi‑story commercial tower can run into the thousands. Add to that any re‑inspection charges if your initial walkthrough reveals issues.
Some cities offer “expedited” processing for an additional fee. If you’re on a tight schedule—perhaps a lease start date is looming—paying extra for a faster review can be a worthwhile investment.
Keeping Your CO Up to Date
Any time you undertake a renovation that changes the building’s occupancy, square footage, or life‑safety systems, you’ll need a new CO. Even a change in the number of units in a multi‑family building triggers a review, because it affects the required number of exits and fire‑apparatus access.
Regularly checking the status of your CO with the local building department is a good habit. Some municipalities maintain an online portal where you can verify the certificate’s validity and view any pending compliance items.
Bottom Line: Treat the CO as a Living Document
The Certificate of Occupancy isn’t just a piece of paperwork you file away after construction. It’s a dynamic record of a building’s legal status, safety compliance, and permissible uses. By understanding the process, staying on top of inspections, and addressing issues promptly, you’ll keep the doors open—literally and figuratively—for years to come.