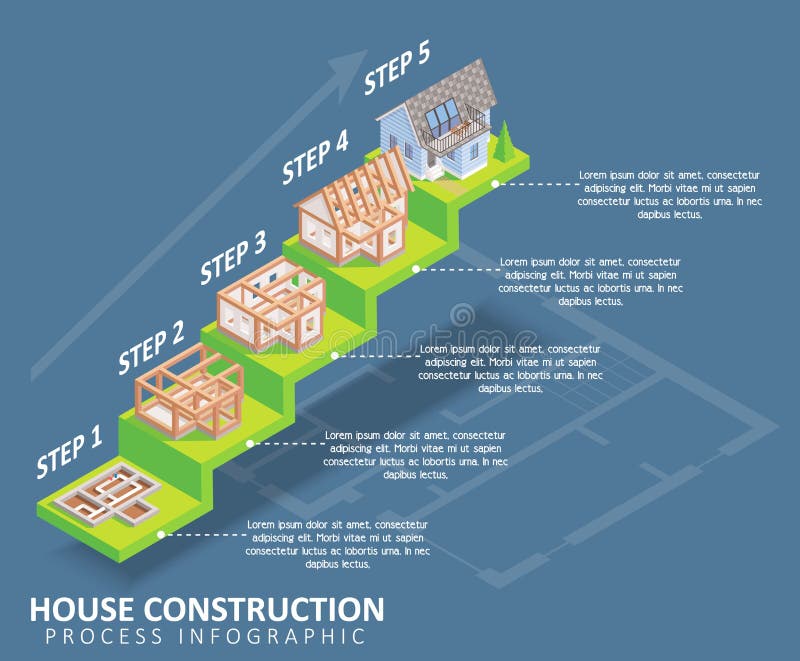
Build A Home With Me: A Step-by-Step Guide
There is something undeniably romantic about the idea of building a home from the ground up. The movies make it look like a glorious montage of mixing concrete, framing walls, and finally cutting the ribbon with a glass of champagne in hand. Reality, however, is a bit more muddy, exhausting, and complex. But for those willing to roll up their sleeves, the process of building a home with me as your guide offers a sense of accomplishment that buying a pre-existing structure simply cannot match.
I’m not suggesting you literally pick up a hammer and swing it for me. Rather, this is a walkthrough of how *you* can build your own home, step by step, avoiding the most common pitfalls that trip up first-time builders. Whether you are planning a tiny house, a modular build, or a traditional stick-built home, the core principles remain the same. Let’s dig in.
Step 1: The Unsexy Foundation – Budgeting and Land
Before you even think about blueprints, you need to secure two things: money and dirt. It sounds insulting, but I can’t stress this enough. Most DIY homeowners fail at this stage because they underestimate the "hidden" costs. Yes, the construction costs are high, but what about the impact fees, utility hookups, soil testing, and architectural drawings?
Create a budget that includes a contingency fund of at least 20%. Prices for lumber, steel, and labor fluctuate wildly. If your house is estimated to cost $300,000, you should have $360,000 in financing accessible. Regarding the land, don’t just buy the cheapest acreage. You need to know the zoning laws, the setback requirements, and whether the soil is stable enough to support a house. A bad lot can cost you more in engineering fixes than the house itself.
Step 2: Designing with Reality in Mind
Now comes the fun part: designing. But here is the catch – keep it simple. Complex rooflines, curved walls, and multiple levels add exponential costs and construction headaches. If you are trying to save money or manage the build yourself, stick to a square or rectangular footprint. A simple gable roof is cheaper and easier to waterproof than a hip roof.
Work with an architect or a draftsman who understands local building codes. You don’t need a fancy custom design; you need a plan that passes inspection. Standardized plans are often cheaper and faster to permit. Think about your long-term needs. Do you actually need a formal dining room, or would that space be better utilized as a home office or a pantries? Every square foot you build costs money, so make every inch count.
Step 3: Navigating the Permit Maze
Here is where many people lose momentum. You have the land, you have the plans, but you cannot break ground until you have permits. This process varies wildly by municipality, but it generally involves submitting your structural, electrical, plumbing, and mechanical plans for review.
Be prepared for feedback. The building department will likely ask for changes to ensure your home meets safety and energy codes. Do not fight them unless you are certain you are right on code; it’s not worth the risk. Getting the permits done correctly the first time saves weeks of delays. Once approved, display the permit at your job site prominently. Inspectors need to see it before they will approve any phase of construction.
Step 4: Breaking Ground and Framing
Finally, the physical work begins. Excavation and foundation laying are typically best left to professionals unless you have industrial equipment. The foundation is the skeleton of your home; if it cracks or settles unevenly, everything else follows suit. Once the footing is poured and cured, you can begin framing.
Framing is where the house takes shape. It is heavy, sweaty work that brings a team spirit to the project. If you are hiring a general contractor, this is a critical phase to monitor. Ensure the framing is square, plumb, and follows the blueprints exactly. Notching joists or studs incorrectly can compromise structural integrity. Take photos during this phase; you’ll need to know where wires and pipes are before you seal up the walls.
Step 5: The Systems: Plumbing, Electrical, and HVAC
With the shell of the house closed in, the invisible systems go in next. This is the guts of your home. Rough-in plumbing and electrical work happen now. This is the time to make decisions that are hard to change later. Do you want recessed lighting? Where will the outlets go for your coffee maker and phone chargers?
HVAC (Heating, Ventilation, and Air Conditioning) is equally crucial. Proper insulation and air sealing are just as important as the heating unit itself. A well-insulated home costs less to heat and keep cool. Don’t skimp on insulation. It is one of the few construction materials you won’t regret overspending on. After the systems are installed, the inspection crew will come back to verify everything is up to code before the drywall goes up.
Step 6: The Finish Line – Drywall, Trim, and Details
Now the house starts to look like a home. Drywall is hung, taped, mudded, and painted. This phase is dusty and tedious but transformative. Once the walls are smooth, you install your trim, doors, cabinets, and flooring.
This is where personality enters the equation. Choose durable materials for high-traffic areas. Luxury vinyl plank flooring is waterproof and durable, making it a great alternative to hardwood in kitchens and bathrooms. Install your lighting fixtures, faucets, and hardware. Each detail adds up. The quality of your cabinet hinges and faucet finish should match the longevity you expect from the home.
Final Walkthrough: The Punch List
Before you hand over the keys or move in, create a punch list. Walk through every room with a flashlight. Check for paint touch-ups, sticking doors, loose handles, and grout lines. Make sure every light switch works and every drain flows correctly. Fix these small issues before celebrating. Building a home is a marathon, not a sprint, but crossing that final threshold makes every headache worth it.
Frequently Asked Questions
- Can Ireally build a house myself without contractors?
While you can act as your own general contractor, it is rarely advisable to do all the skilled labor yourself unless you have extensive trade experience. Hiring specialized subcontractors for electrical, plumbing, and roofing is safer and often cost-effective when you factor in liability and workmanship quality. - How long does it take to build a custom home?
On average, it takes 12 to 18 months from breaking ground to move-in day. Delays due to weather, supply chain issues, or permit holdups are common, so having a flexible timeline is essential. - Is it cheaper to build a modular home?
Modular or kit homes can be 10-20% cheaper than traditional stick-built homes because materials are bought in bulk and construction occurs in a controlled factory environment, reducing waste and weather delays. - What is the biggest mistake new builders make?
Underestimating the budget and timeline. Always pad your contingency fund and expect the project to take longer than initially planned. Rushing decisions often leads to expensive corrections later.