How to Easily Cancel a Subscription on Your iPhone
Are you tired of being charged for a subscription you no longer want or need? Canceling a subscription on your iPhone can be a bit tricky if you don't know where to look. In this article, we'll walk you through the easy steps to cancel a subscription on your iPhone, and provide you with some useful tips to keep in mind.
Understanding Subscriptions on Your iPhone
When you sign up for a subscription on your iPhone, it's usually through the App Store. This could be a monthly or yearly subscription for a service like Netflix, Spotify, or Apple Music. The subscription is linked to your Apple ID, and it's managed through the Settings app on your iPhone.
Methods to Cancel a Subscription on Your iPhone
There are a few ways to cancel a subscription on your iPhone. Here are the steps for each method:
### Method 1: Canceling through the Settings App
1. Open the Settings app on your iPhone.
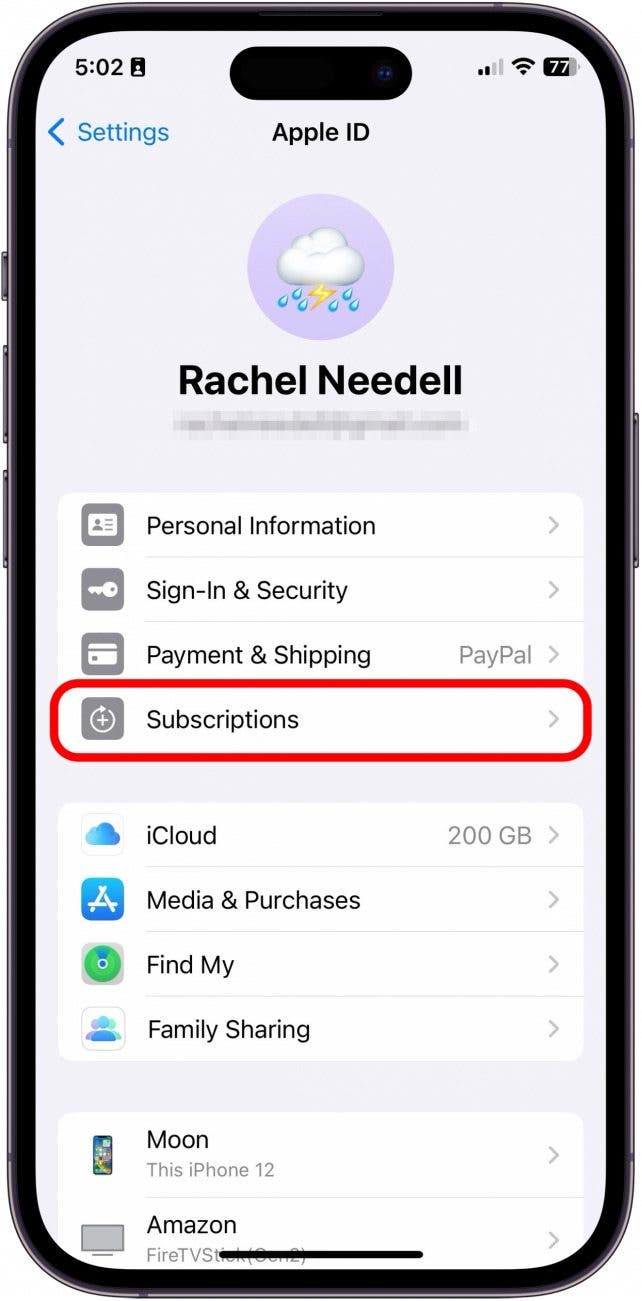
2. Tap on your name at the top of the screen.
3. Tap on "Subscriptions".
4. Find the subscription you want to cancel and tap on it.
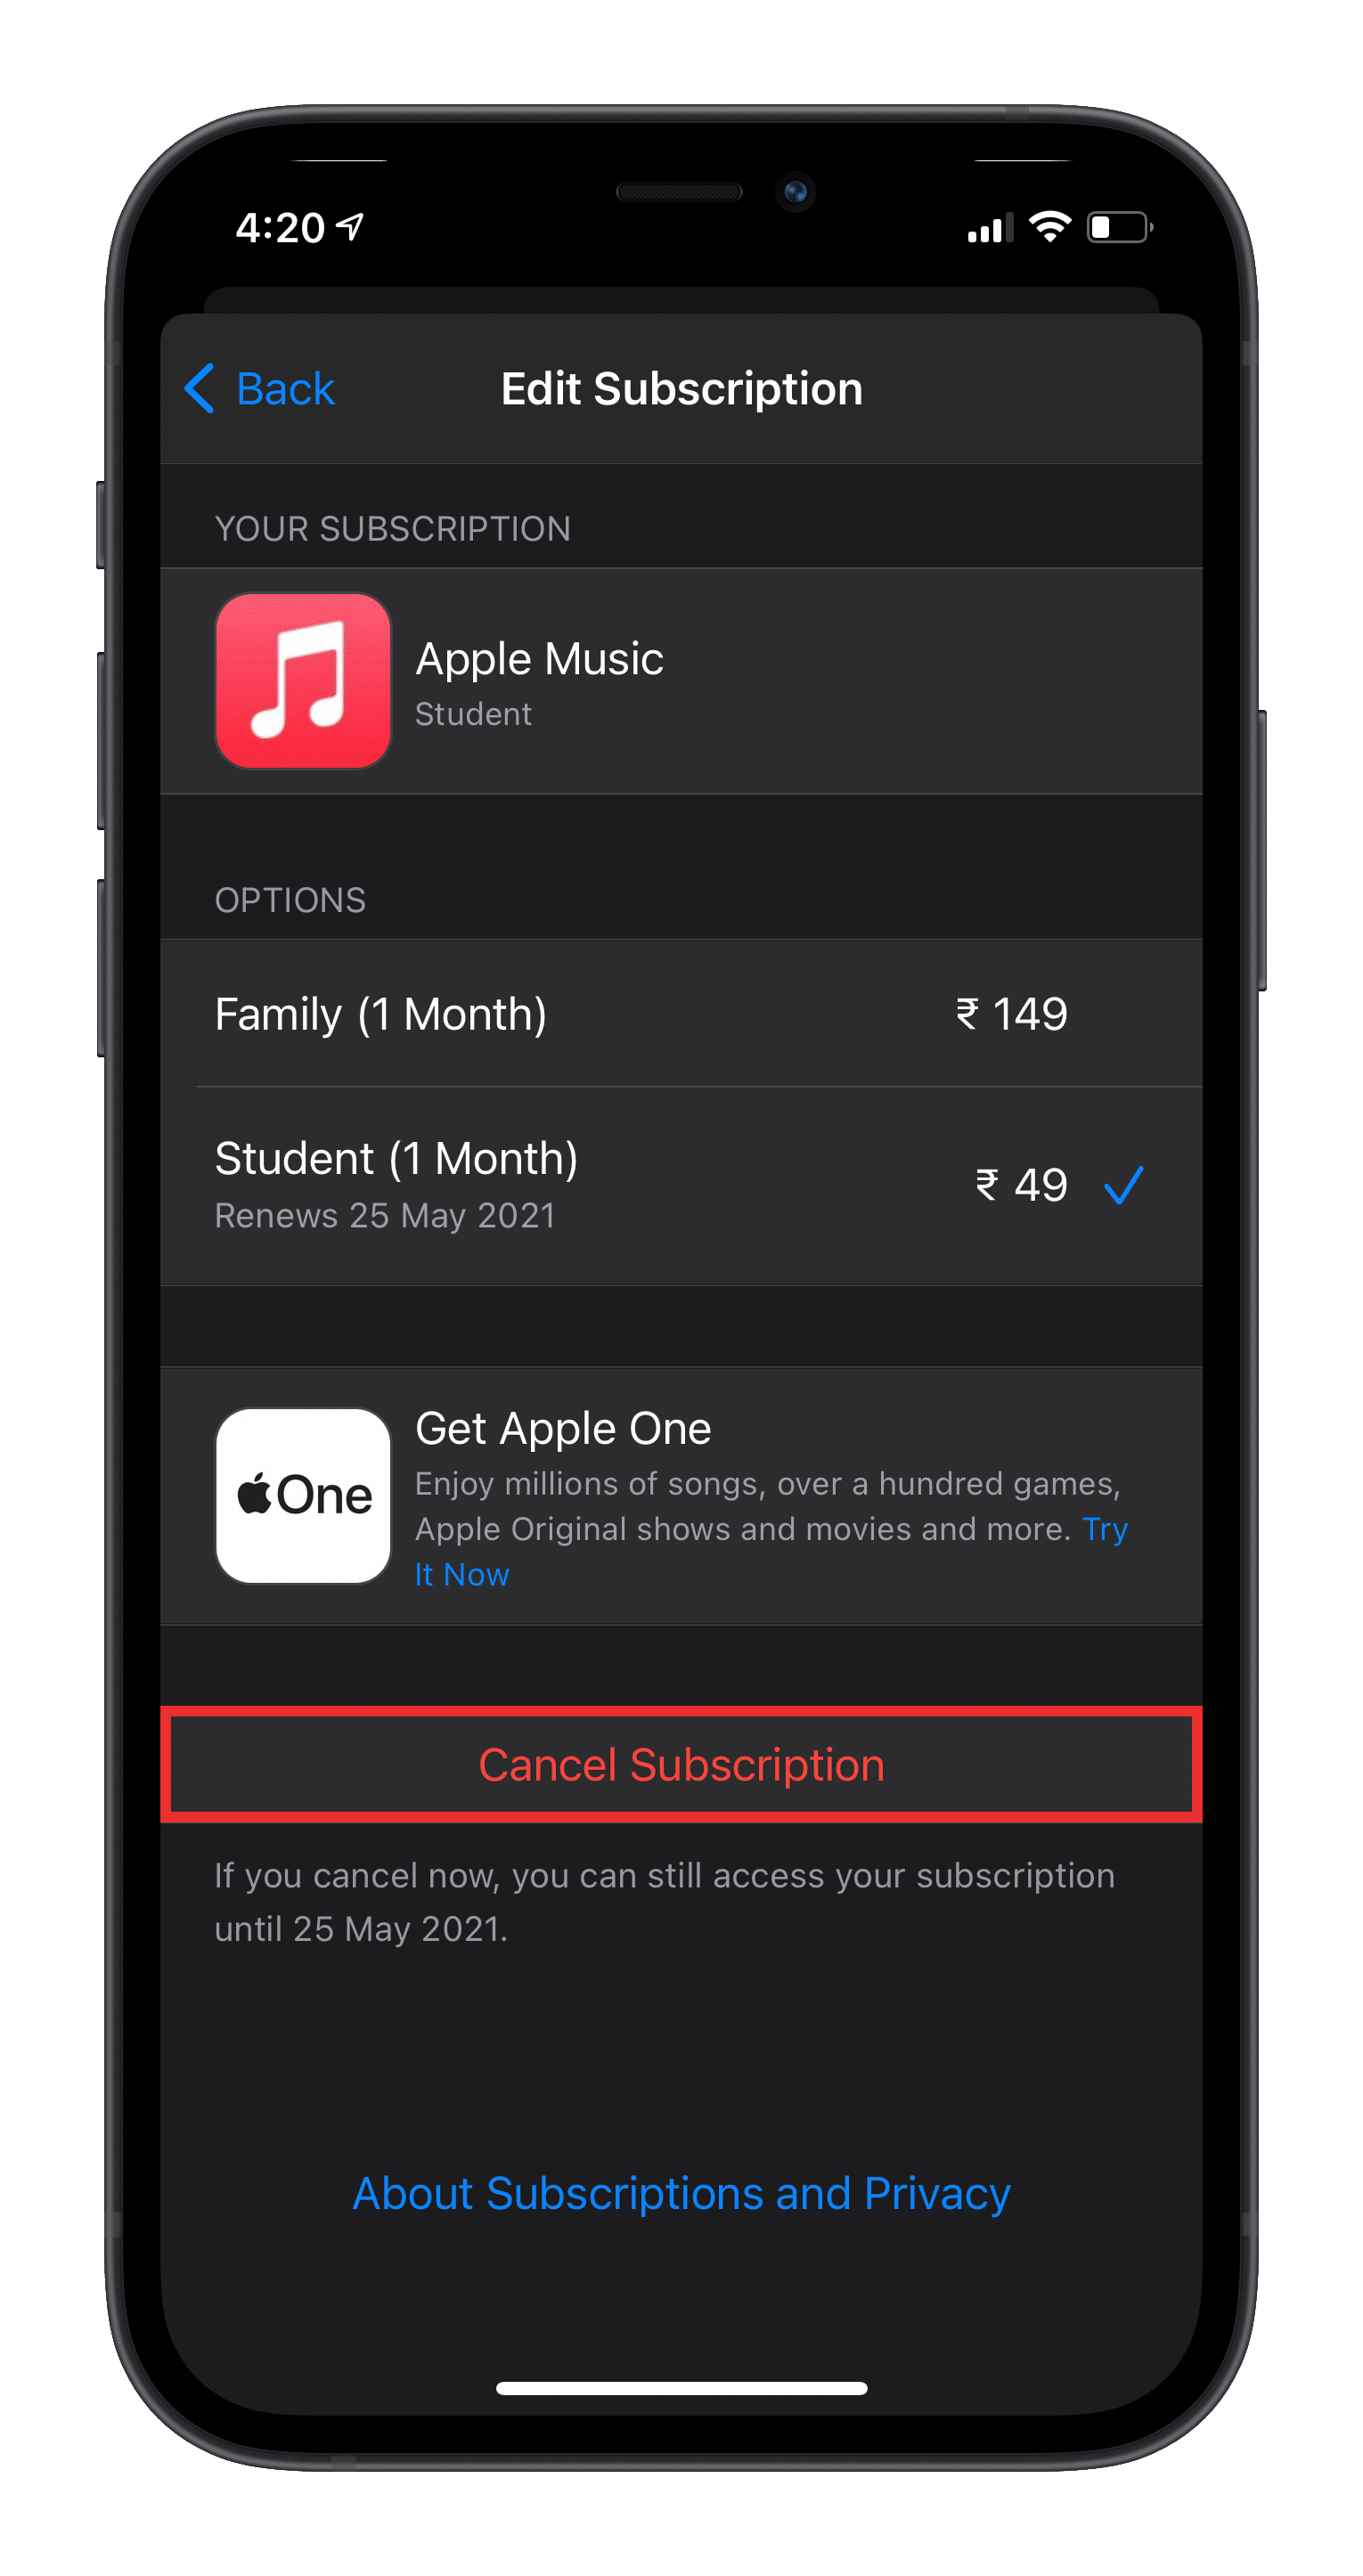
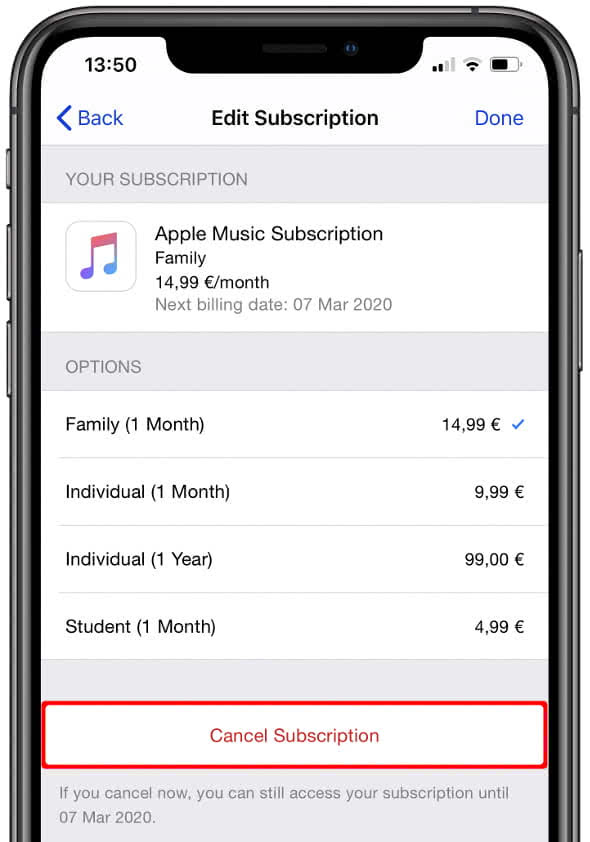
5. Tap on "Cancel Subscription".
6. Confirm that you want to cancel the subscription.
### Method 2: Canceling through the App Store
1. Open the App Store on your iPhone.
2. Tap on your profile picture or icon at the top right corner of the screen.
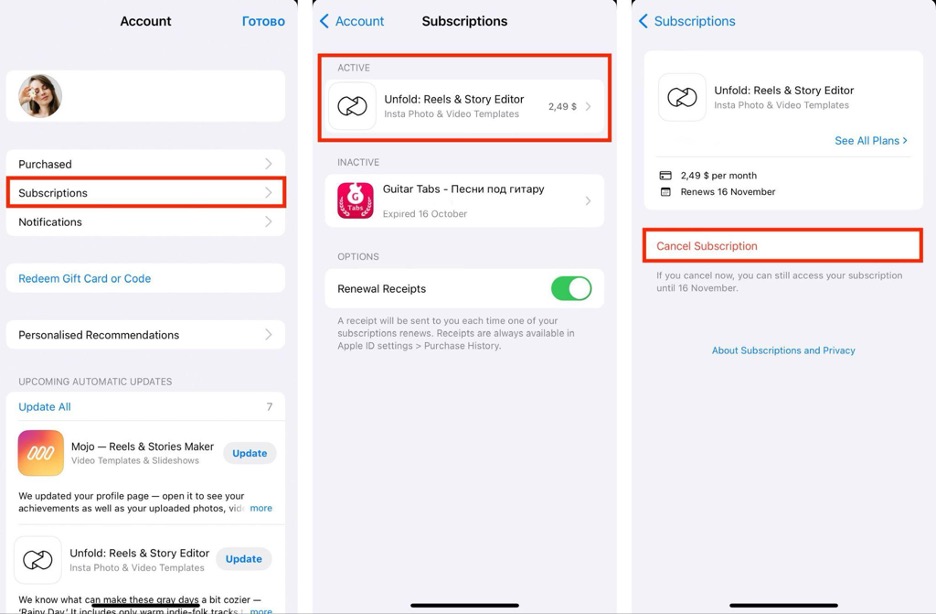
3. Tap on "Subscriptions".
4. Find the subscription you want to cancel and tap on it.
5. Tap on "Cancel Subscription".
6. Confirm that you want to cancel the subscription.
### Method 3: Canceling through the App Itself
Some apps, like Netflix or Spotify, allow you to cancel your subscription directly within the app. Here's how:
1. Open the app on your iPhone.
2. Look for an account or settings section.
3. Find the option to cancel your subscription.
4. Follow the prompts to confirm cancellation.
What Happens When You Cancel a Subscription?
When you cancel a subscription, you'll still have access to the service until the end of the billing period. This means that if you cancel a monthly subscription on the 15th of the month, you'll still have access to the service until the end of the month.
Tips and Tricks
* Make sure you're canceling the right subscription. Double-check the subscription details before confirming cancellation.
* If you're canceling a free trial, be aware that you might still be charged if you don't cancel before the trial ends.
* Keep an eye on your subscription renewals. You can set reminders or check your subscription status regularly to ensure you're not being charged for a service you no longer use.
Troubleshooting Common Issues
* If you're having trouble finding the subscription you want to cancel, try checking your Apple ID account page or contacting the app developer for help.
* If you're being charged unexpectedly, check your subscription status and look for any suspicious activity.
Conclusion
Canceling a subscription on your iPhone is a relatively straightforward process. By following the steps outlined above, you can easily cancel a subscription and avoid unwanted charges. Remember to always review your subscription details and terms before confirming cancellation.
By taking control of your subscriptions, you can save money and avoid clutter on your iPhone. If you have any further questions or concerns, feel free to explore Apple's support resources or reach out to the app developer directly.