How to Transfer Data Seamlessly with Samsung Smart Switch
Switching to a new phone can feel like moving house—your apps, photos, and settings are all packed into boxes, and you just hope nothing gets lost. Samsung’s Smart Switch aims to be the moving truck that handles everything in one go, whether you’re leaping from an older Galaxy, an iPhone, or even a non‑Android device. Below is a practical walk‑through that keeps the process simple and, ideally, headache‑free.
Why Choose Smart Switch?
- All‑in‑one migration: Contacts, messages, photos, videos, and even Wi‑Fi passwords make the trip.
- Cross‑platform support: Works with iOS, Android, and Windows phones.
- No extra fees: The app is free on the Play Store and Galaxy Store.
- Multiple transfer routes: Choose wireless, wired, or PC‑mediated moves.
Preparing Your Devices
Before you dive in, spend a minute getting both phones ready. A few minutes now can save you from a frantic reboot later.
Check Compatibility
Smart Switch runs on Android 5.0+ and iOS 9+. Look up your device’s model on Samsung’s support page if you’re unsure. Older phones might need a quick software update.
Backup Essentials
- Make sure the battery is at least 50 % on both devices.
- Turn off any battery‑saving modes that could cut off Wi‑Fi or USB.
- If you have a microSD card, back it up separately; Smart Switch doesn’t touch external storage.
Choosing a Transfer Method
Smart Switch offers three main pathways. Your choice often depends on the amount of data and the tools you have handy.
- Wireless (Wi‑Fi Direct): No cables, but slower for large media libraries.
- Wired (USB‑C or USB‑OTG): Speedy, especially for high‑resolution videos.
- PC‑Based: Ideal when you want a double backup—first onto your computer, then onto the new phone.
Step‑by‑Step: Wireless Transfer
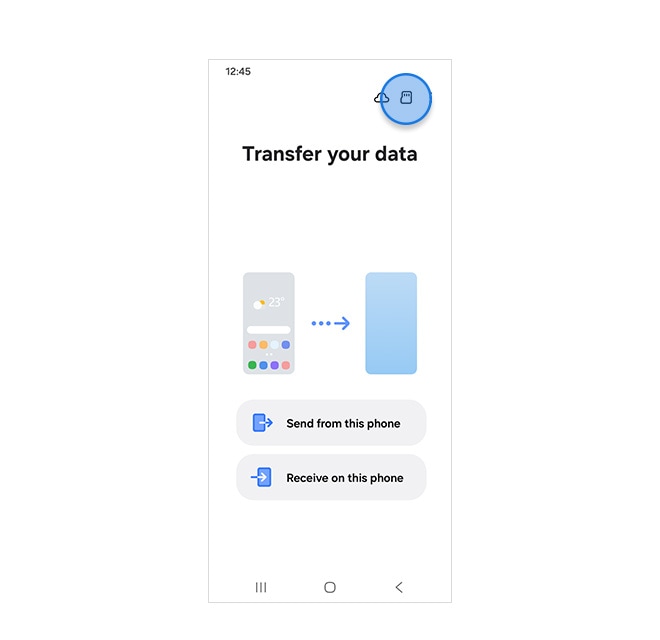
1. Install Smart Switch from the Play Store on both phones. Open the app and tap Send data on the old device, Receive data on the new one.
2. Select Wireless as the method. A QR code appears on the receiving phone.
3. Point the old phone’s camera at the QR code. The devices will pair automatically—think of it as a digital handshake.
4. Choose what you want to move. You can pick everything, or just contacts and messages if you’re short on space.
5. Hit Transfer. A progress bar gives you a rough idea of how long it’ll take; expect 30‑45 minutes for a full media dump.
6. When the bar hits 100 %, the app will confirm completion. Reboot the new phone just to make sure all apps settle in.
Step‑by‑Step: Wired Transfer
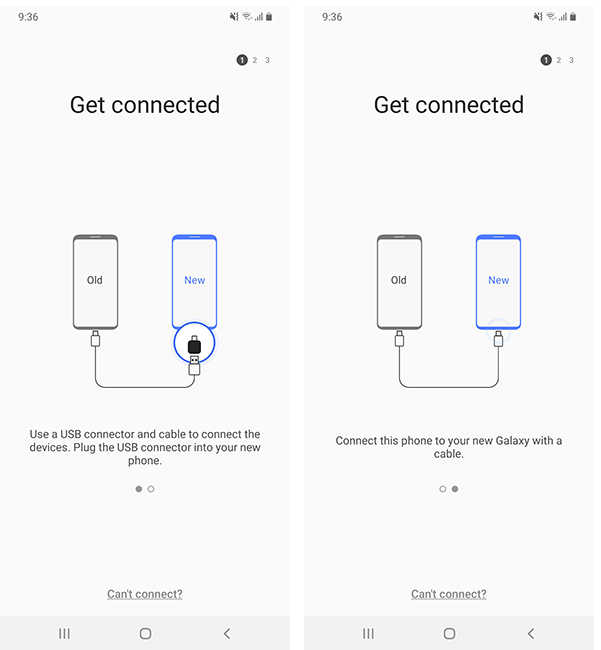
1. Grab a USB‑C to USB‑C cable (or a USB‑C to USB‑A with an OTG adapter if your old phone uses a regular micro‑USB).
2. Connect the two phones. The old device will display a prompt—choose Transfer data and allow the connection.
3. On the new phone, open Smart Switch and select Receive data → Wired. The app detects the cable and asks you to confirm the source device.
4. Pick the data categories you need. Wired mode often shows a quick preview of the estimated transfer size.
5. Tap Start Transfer. Thanks to the direct link, most users see the process finish in under 15 minutes.
6. Disconnect the cable, then give the new phone a brief restart. Your apps should already be syncing with the Play Store.
Common Hiccups and How to Fix Them
- Devices won’t see each other wirelessly: Turn Wi‑Fi off and back on, then retry pairing.
- Transfer stalls at 0 %: Ensure both phones have enough free storage; delete a few unused apps if needed.
- App data missing after transfer: Some apps (like banking) don’t copy over for security reasons—download them again from the store.
- Battery drains quickly during migration: Plug both phones into chargers; it’s far safer than risking a shutdown.
Tips for a Smooth Migration
- Do a quick cloud backup (Google Drive, OneDrive) as an extra safety net.
- If you have a lot of videos, consider moving them to a PC first; large files travel faster over USB‑3.0.
- Disable two‑factor authentication temporarily on accounts that sync automatically; re‑enable once the transfer is done.
- Give the new phone a few minutes of idle time after migration—some background services finish indexing media in the background.
With a bit of preparation and the right connection method, Smart Switch can turn a potentially messy switch‑over into a relatively painless experience. Happy new‑phone adventures!