How to Isolate DNA Fragments: A Simple Step‑by‑Step Guide
Whether you’re a student setting up a gel‑based experiment or a researcher needing clean inserts for cloning, isolating DNA fragments is a routine yet surprisingly nuanced task. The process starts with a clear goal—getting the piece of genetic material you need without unwanted baggage—then follows a handful of well‑established techniques. Below, we walk through the essential concepts, the most common methods, and a practical workflow you can adapt to most labs.
Why Isolate DNA Fragments?
In molecular biology, a DNA fragment is often the raw material for downstream applications: sequencing, cloning, PCR verification, or CRISPR editing. Isolating the fragment removes surrounding nucleic acids, proteins, and salts that could interfere with enzymes or analytical instruments. In short, clean DNA means reliable results and fewer headaches later on.
Core Principles Behind the Process
All isolation strategies share three basic principles:
- Separation: Distinguish the target fragment from the rest of the sample, usually by size or affinity.
- Purification: Remove contaminants such as enzymes, primers, nucleotides, and buffer components.
- Concentration: Adjust the final volume so the DNA is usable for the next step, often by ethanol precipitation or spin‑column elution.
Understanding these pillars helps you choose the right kit or protocol for a given project.
Common Methods for Isolating DNA Fragments
1. Gel Extraction
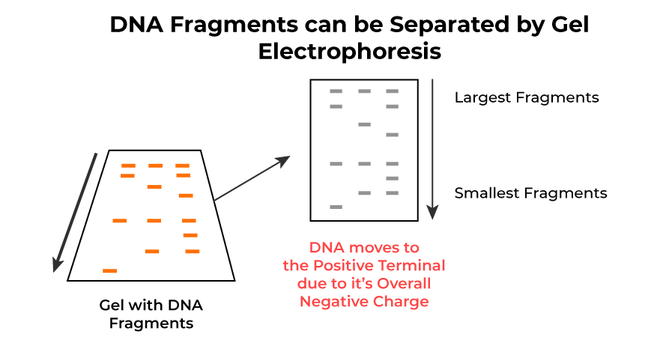
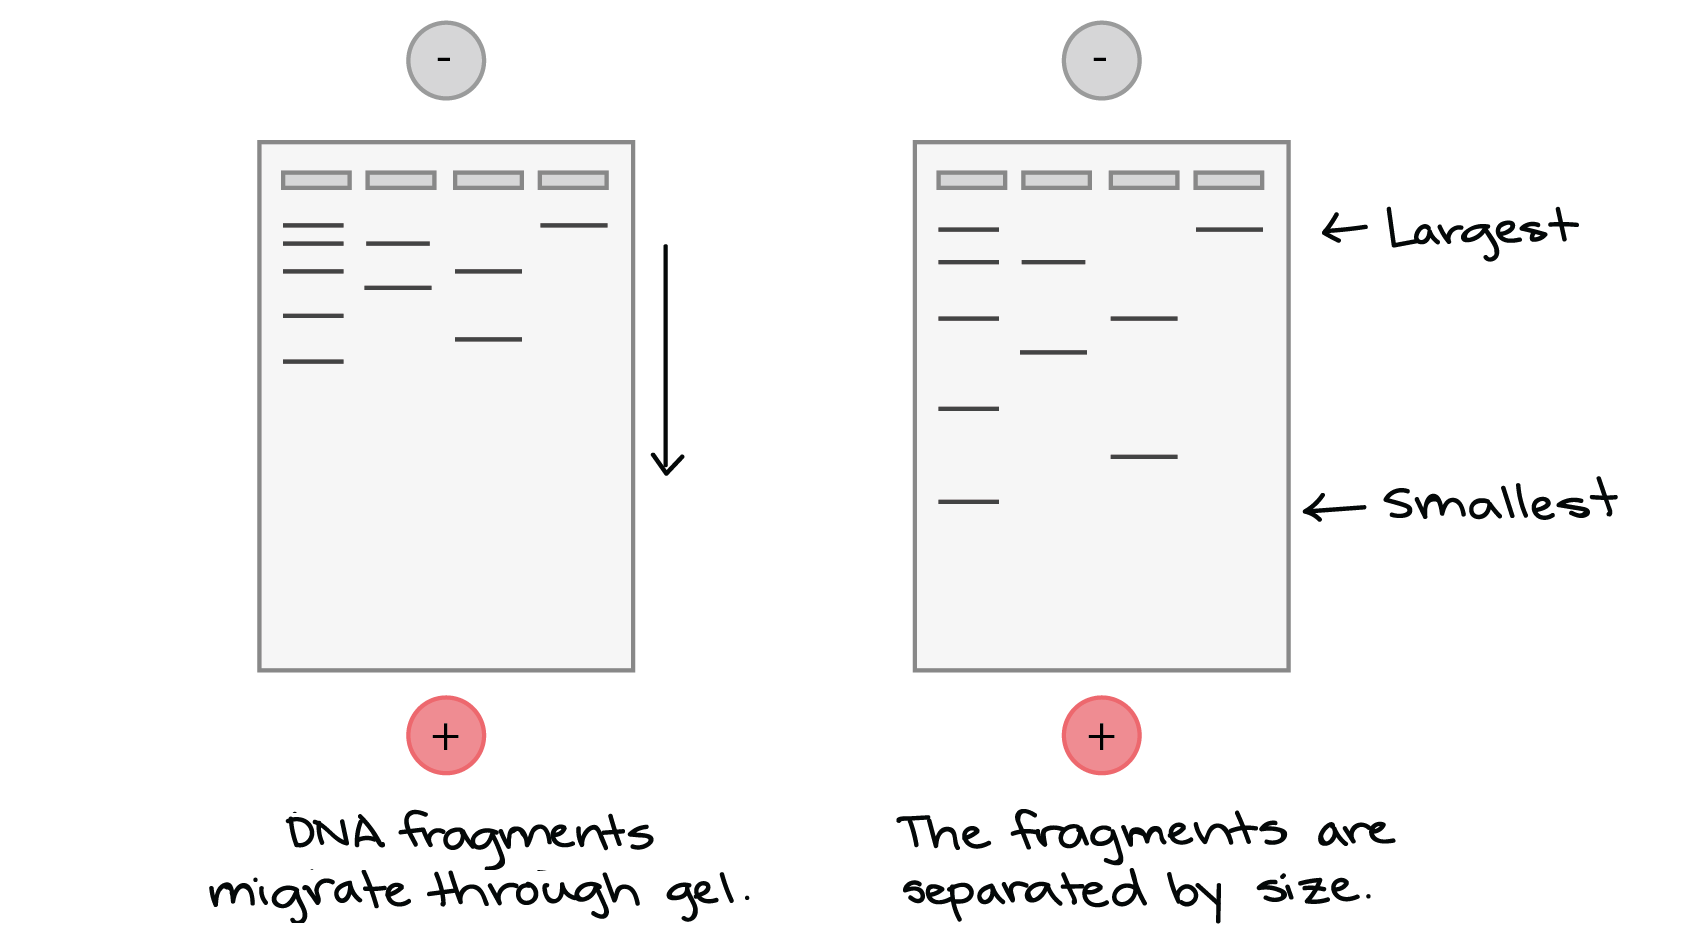
When you run a PCR product or restriction digest on an agarose gel, the fragment of interest appears as a distinct band. Cutting out that band and purifying the DNA is a classic approach.
Typical steps include:
- Excise the band with a clean scalpel.
- Melt the agarose slice in a specialized buffer.
- Bind the DNA to a silica membrane or magnetic beads.
- Wash away gel residues and elute in a low‑salt solution.
This method excels when size discrimination is critical, but it can be time‑consuming and may yield modest amounts of DNA.
2. Column‑Based Purification
Spin‑column kits use silica membranes that bind DNA in the presence of chaotropic salts. After loading the sample, you wash the column to discard proteins and salts, then elute the DNA with a small volume of water or TE buffer.
Advantages include speed, reproducibility, and the ability to handle multiple samples in parallel. The main limitation is that very large fragments (>20 kb) sometimes bind less efficiently.
3. Magnetic Bead Capture
Paramagnetic beads coated with silica or carboxyl groups can replace columns for high‑throughput workflows. The beads bind DNA when mixed with binding buffer, and a magnet holds them while you perform wash steps.
Bead‑based methods are especially popular in automation because they eliminate centrifugation steps and can be scaled up or down with minimal protocol changes.
Step‑by‑Step Workflow (Using a Spin‑Column Kit)
Below is a concise, generic protocol that works for most PCR products and restriction fragments under 5 kb. Adjust volumes according to your kit’s instructions.
- Prepare the sample: If starting from a gel, follow the extraction kit’s “gel solubilization” instructions. For a liquid PCR mix, skip this step.
- Add binding buffer: Mix the sample with the provided chaotropic buffer (usually 5–6 µL per µg of DNA). This creates the conditions for DNA to adhere to silica.
- Load onto the column: Transfer the mixture to the spin column placed in a collection tube. Spin at 10,000 × g for 30 seconds.
- Wash: Add the wash buffer (often containing ethanol) and spin again. Repeat if the kit recommends a second wash.
- Dry the membrane: A brief spin (≈1 minute) removes residual ethanol that could inhibit downstream enzymes.
- Elute: Place the column in a clean tube, add 30–50 µL of elution buffer or nuclease‑free water, and spin for 1 minute. You now have purified DNA ready for use.
Throughout the process, keep the DNA on ice or at 4 °C if you anticipate a delay, especially before the final elution step.
Tips for Maximizing Yield and Purity
- Use freshly prepared buffers; old ethanol can contain water that dilutes the wash solution.
- Avoid over‑drying the silica membrane; a few seconds of residual moisture helps the DNA dissolve during elution.
- If the fragment is larger than 5 kb, consider a low‑binding column or a gentle elution buffer (e.g., TE with a low pH).
- For low‑concentration samples, increase the elution volume slightly, then concentrate the DNA with a brief ethanol precipitation.
Troubleshooting Common Issues
Low yield: Check that you added enough binding buffer; insufficient chaotropic salt reduces DNA capture. Also verify that the column wasn’t overloaded—most kits recommend ≤ 50 µL of sample per spin.
Smearing on the gel: Residual salts or phenol can cause streaking. Ensure thorough washing, and consider a second wash if the kit allows.
Fragment degradation: Prolonged exposure to high temperatures during gel extraction can nick DNA. Keep melt steps short (< 5 minutes) and work quickly.
Safety and Best Practices
While DNA isolation is low‑risk, standard molecular‑biology safety still applies. Wear gloves, work in a designated clean area, and dispose of agarose and buffer waste according to your institution’s guidelines. If you use UV transilluminators to visualize gels, wear appropriate eye protection and limit exposure.
Frequently Asked Questions
Can I reuse a spin column for a second sample?
Generally no. Once the silica membrane has bound DNA, its capacity is reduced, and residual contaminants may carry over. For cost‑savings, some labs use a single column for a pooled sample, but that’s a different workflow.
Is ethanol precipitation still relevant with modern kits?
Yes, especially when you need to concentrate a dilute eluate. Adding 0.1 volume of sodium acetate and 2.5 volumes of cold ethanol, then incubating at –20 °C for 30 minutes, usually yields a clean pellet that can be redissolved in a smaller volume.
What fragment size range is ideal for gel extraction?
Fragments between 100 bp and 5 kb are easiest to extract cleanly. Very small fragments (< 50 bp) may run off the gel or be lost during the melt step, while very large fragments (> 10 kb) can be fragile and may require a low‑melting‑point agarose.
Do magnetic beads work for RNA as well?
Many bead kits are designed specifically for nucleic acids and can capture RNA under the right buffer conditions. However, RNA isolation typically demands RNase‑free reagents and additional steps to prevent degradation.